The Ultimate Guide To Fresh And Clean Bedsheets

image of bedsheet

Bedsheets are an essential part of daily life. We spend hours on them each night, resting, sleeping, and unwinding. Keeping them clean is crucial, not just for comfort but also for maintaining good hygiene. But how often should you wash your bedsheets? In this article, we’ll cover everything you need to know about washing your bedsheets, including how often to wash them, why it matters, and the best cleaning practices to ensure they stay fresh and last longer.

Why Is It Important to Wash Bedsheets Regularly?

Your bed is the place where you spend a significant amount of time each day. You sweat, shed skin cells, and even release oils while you sleep. Combined with dust and pollen from the air, these elements make your bedsheets a breeding ground for bacteria, dust mites, and other allergens. This accumulation of dirt and bacteria can lead to various health problems, including skin irritation, acne breakouts, allergies, and respiratory issues.

Washing your bedsheets regularly helps remove these potential health hazards, keeping your skin clean and reducing the risk of infection. Fresh bedsheets provide a hygienic sleeping environment and contribute to a peaceful, relaxing night’s sleep.

How Often Should You Wash Your Bedsheets?

Most people should wash their bedsheets every week. This frequency ensures that your sheets stay free from bacteria, dirt, and allergens. However, several factors can influence how often you wash your sheets.

Personal Hygiene and Health Conditions

If you sweat heavily at night, your sheets will need more frequent washing. Excessive sweating can lead to an increased buildup of bacteria and unpleasant odors. If you’re recovering from an illness or have a cold, it’s advisable to wash your sheets more often to prevent germs from lingering.

For those with skin conditions like eczema or acne, washing your sheets regularly can help prevent flare-ups. Skin oils, sweat, and dirt accumulating on your sheets may contribute to breakouts or irritate sensitive skin.
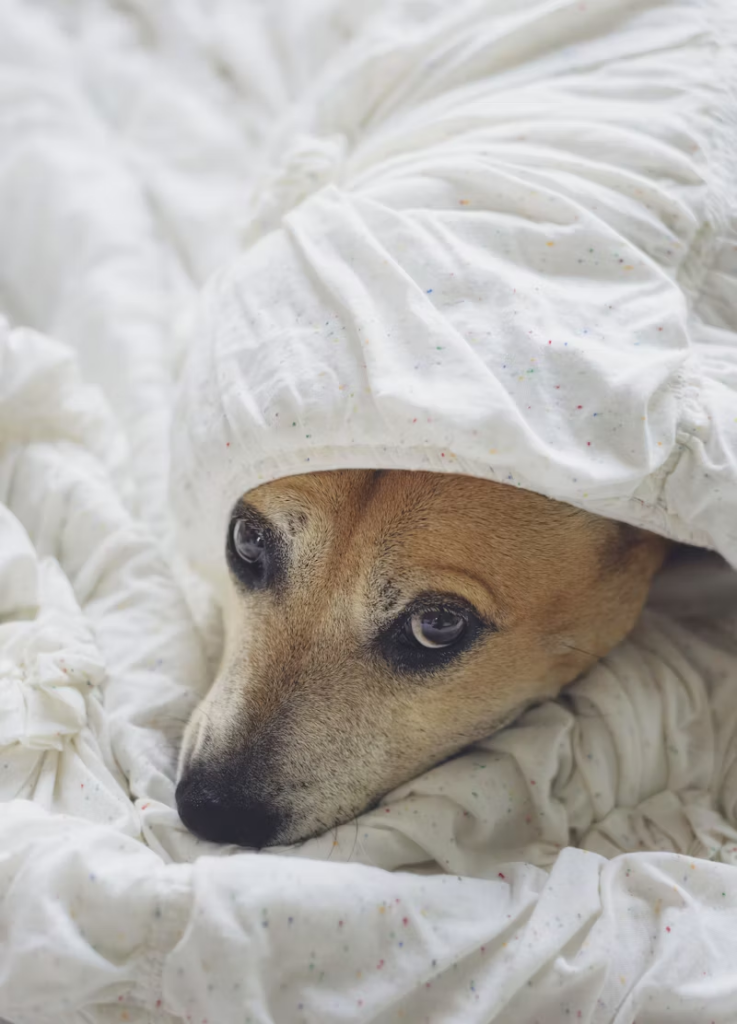
dog in bedsheet

Pet Owners

If your pets sleep in your bed, wash your sheets more frequently. Pets bring dirt, hair, and dander into your bed, which can accumulate quickly. Regular washing helps reduce allergens and pet odors that can be transferred to your sheets.

Allergies

If you suffer from allergies, washing your bedsheets at least once a week is essential. Dust mites and pollen particles that collect in your sheets can trigger allergic reactions, leading to sneezing, itchy skin, or even respiratory issues. For allergy sufferers, washing sheets more frequently, such as every 3-4 days, can help minimize exposure to these allergens.

Night Sweats or Heavy Sweating

Night sweats can make washing your sheets more of a necessity. If you experience excessive sweating during sleep, you may need to wash your sheets twice weekly to avoid bacterial growth and odors.

Lifestyle and Work Environment

People with physically demanding jobs or working in environments exposed to dust, dirt, or chemicals may want to wash their sheets more frequently. If your clothes or skin are exposed to dirt and chemicals, they can transfer to your sheets, making regular washing essential.

What Happens if You Don’t Wash Your Sheets Often Enough?

If you don’t wash your sheets often enough, you might be exposing yourself to several issues. Bacteria, dust mites, sweat, and dead skin cells can build up in your sheets over time. This can cause skin irritation, allergies, and acne. Furthermore, the longer you go without washing your sheets, the more likely it is that odors will begin to develop. Dust mites, which feed on skin flakes, thrive in unwashed sheets’ warm, moist environment. Over time, they can contribute to health problems, especially those with asthma or other respiratory conditions.

washing detergent for bedsheet

Best Practices for Washing Bedsheets

To get the best results when washing your bedsheets, follow these simple best practices:

Check the Care Label

Before you wash your sheets, always refer to the care label. The care instructions will tell you the ideal water temperature, drying method, and detergent type for your sheets. Following these instructions will help preserve the fabric and ensure your sheets last longer.

Use the Right Water Temperature

When it comes to washing bedsheets, water temperature is key. For most fabrics, a warm wash (around 40°C) is effective at cleaning while preserving the fabric. Hot water may be too harsh and cause colors to fade or fabrics to shrink. Cold water is gentler but may not effectively kill bacteria or remove heavy dirt.

To ensure thorough cleaning, you can use hot water for specific fabrics, such as cotton. However, be careful when washing delicate sheets like silk, as hot water can damage the fabric.

Choose the Right Detergent

Using a gentle, skin-friendly detergent will help prevent skin irritation. Harsh chemicals in some laundry detergents can cause reactions on sensitive skin, so it’s best to choose a mild detergent. Additionally, avoid using fabric softeners, as they can leave a residue on the sheets that may irritate the skin over time.

Dry Thoroughly

After washing your sheets, it’s essential to dry them thoroughly. Damp sheets can lead to mildew and unpleasant odors. If possible, air-dry your sheets in the sun. Sunlight helps kill bacteria and gives your sheets a fresh, natural scent.

If you’re using a dryer, ensure the sheets are completely dry before putting them back on your bed. High heat settings are great for securing thoroughly dried and bacteria-free sheets.

Extra Tips for Keeping Your Sheets Fresh

In addition to regular washing, here are some tips to help keep your sheets fresh and clean for longer:

  • Use a Mattress Protector: A mattress protector acts as a barrier between your mattress and your sheets, preventing the accumulation of dirt, sweat, and oils. This can reduce the frequency at which you need to wash your sheets.
  • Wash Pillowcases Frequently: Pillowcases come into direct contact with your face and hair, which makes them a hotspot for oil buildup. Wash pillowcases at least once a week, even if you don’t wash the entire set of sheets.
  • Rotate Your Sheets: Keep extra bedsheets on hand to rotate between washes. This ensures that your sheets properly rest between washes, preventing wear and tear.
  • Invest in High-Quality Sheets: High-quality sheets made of natural fibers, such as cotton or linen, tend to hold up better over time and are easier to clean. These fabrics are more breathable and can help regulate your body temperature while you sleep, leading to fewer sweat stains.

Final Thoughts

Washing your bedsheets regularly is crucial for both hygiene and comfort. Aiming to wash them once a week is a good rule of thumb, but factors like personal health, pets, allergies, and lifestyle can affect how often you wash them. You’ll enjoy fresh, clean sheets every night by following proper washing practices and maintaining a consistent cleaning schedule. Remember, a clean bed feels better and contributes to better health and a more restful sleep.

Post-Holiday Cleaning Hacks You Must Know For Your Home!

image of a messy house

The holiday season is all about joy, laughter, and celebrations. Between hosting family gatherings, festive feasts, and parties with friends, your home probably saw a lot of action. Once the celebrations wind down, it’s easy to feel overwhelmed by the mess left behind. Whether it’s leftover food stains, decorations strewn about, or cluttered rooms, returning your home to its pre-holiday state can feel like a massive task.

But don’t worry! You can tackle the post-holiday mess efficiently with the right approach and a few smart cleaning hacks. Here’s your ultimate guide to restoring order with quick and effective cleaning solutions.

1. Start with Decluttering

The first step in post-holiday cleaning is clearing the clutter. Holiday gatherings often leave behind decorations, wrapping paper, boxes, and random items scattered around the house.

  • Take One Room at a Time: Start with one area, such as the living room, before moving on to others. This prevents you from feeling overwhelmed.
  • Sort and Organize: Gather items like decorations, unused wrapping paper, and ribbons. Store reusable items neatly in boxes for next year. Donate or recycle anything you won’t need.
  • Use Storage Bins: Use clear plastic storage bins to organize decorations. Label them for easy access next year.

A clutter-free space will instantly make your home feel cleaner and more manageable.

2. Focus on Deep Cleaning High-Traffic Areas

The living room, dining area, and kitchen are usually the most-used holiday spaces. These areas often collect dirt, food crumbs, and spills.

  • Vacuum and Mop Thoroughly: Clean carpets, rugs, and upholstered furniture to remove dust, dirt, and food particles. Follow up with mopping floors, especially in high-traffic areas.
  • Spot-Clean Stains: Immediately treat any stains on sofas, carpets, or dining chairs. Use a mixture of baking soda and water for stubborn stains. Dab, don’t rub, to avoid spreading.
  • Clean Tabletops and Surfaces: Wipe down all surfaces with a gentle all-purpose cleaner. Pay attention to coffee tables, counters, and dining tables. For wood surfaces, use a wood-safe cleaner.

A deep clean ensures your home looks and feels fresh after the hustle and bustle of the holidays.

image of a kitchen

3. Tackle the Kitchen Chaos

If you hosted holiday feasts, your kitchen is probably the hardest hit. From dirty dishes to sticky countertops, it’s time to give your kitchen the attention it deserves.

  • Clean the Oven and Stove: Grease and food splatters can build up during heavy cooking. Use a baking soda paste to scrub off stubborn stains from the oven and stove.
  • Wash Dishes and Appliances: Run your dishwasher for a deep clean. Don’t forget smaller appliances like the microwave, toaster, and coffee maker, which may have collected crumbs and residue.
  • Clear Out the Fridge: Toss out expired leftovers and wipe down the shelves with water and white vinegar. Organize items neatly to make space for fresh groceries.

You’ll feel less stressed and ready to return to your routine by tackling the kitchen early.

4. Freshen Up the Bathrooms

Bathrooms often get overlooked but quickly become dirty, with multiple guests using them during holiday gatherings.

  • Scrub Surfaces: Use a disinfectant cleaner to scrub sinks, counters, and toilets. Pay attention to areas like faucet handles, which can collect germs.
  • Wash Towels and Mats: Replace used hand towels, bath towels, and floor mats with fresh, clean ones. This instantly revitalizes the space.
  • Polish Mirrors and Fixtures: Use glass cleaner to wipe down mirrors and stainless steel fixtures for a spotless shine.

A clean and tidy bathroom makes a big difference in the overall feel of your home.

5. Restore the Bedrooms

If you had guests staying over, it’s essential to freshen up the bedrooms and make them guest-free again.

  • Strip the Linens: Wash all bedding, including sheets, pillowcases, and comforters. Vacuum the mattress to remove dust and allergens.
  • Declutter Surfaces: Clear out any leftover items like guest toiletries, bags, or extra blankets. Return items to their proper places.
  • Freshen the Air: Open the windows to let in the fresh air and use air fresheners or essential oils to eliminate lingering odors.

Caring for the bedrooms will ensure your home feels peaceful and organized again.

6. Use Natural Deodorizers to Eliminate Odors

Post-holiday cooking, guests, and decorations can leave your home smelling less than fresh. Combat lingering odors with natural deodorizers:

  • Baking Soda: Place bowls of baking soda in different rooms to absorb odors. You can also sprinkle baking soda on carpets before vacuuming.
  • White Vinegar: Leave small bowls of white vinegar around the kitchen and dining areas to neutralize strong smells.
  • Essential Oils: Use diffusers with lavender, eucalyptus, or citrus for a clean, refreshing scent.

Natural deodorizers ensure your home smells fresh without the use of harsh chemicals.

7. Speed Up Cleaning with a Systematic Approach

The key to efficient post-holiday cleaning is having a game plan. Follow these steps to make the process quicker and less overwhelming:

  • Work in Sections: Focus on one room at a time rather than jumping between spaces. Complete one area before moving on.
  • Set a Timer: Give yourself 20-30 minutes per room to stay focused and avoid burnout.
  • Enlist Help: If family members are around, assign tasks to everyone. Teamwork makes cleaning faster and more manageable.

Breaking up the cleaning process into smaller tasks makes it feel less daunting and helps you accomplish more in less time.

8. Consider Hiring Professional Help

If post-holiday cleaning feels too overwhelming, don’t hesitate to hire professional cleaners. A part-time cleaning service can take care of the deep cleaning for you, leaving your home spotless without the stress.

  • Benefits of Hiring Professionals:
    • Saves time and effort.
    • Ensures thorough cleaning of hard-to-reach areas.
    • Leaves your home looking and feeling fresh.

Many cleaning companies offer post-holiday packages tailored to your needs, making it a convenient and practical option.

Final Thoughts

The holiday season may leave behind memories, laughter, and, unfortunately, a messy home. However, with these practical post-holiday cleaning hacks, you can quickly restore your home to its sparkling clean state. By decluttering, deep cleaning high-traffic areas, tackling the kitchen and bathrooms, and freshening up the air, you’ll be well on your way to a clean and organized space.

If time is a constraint, consider hiring professional cleaners to give you a head start. Whether you tackle the mess yourself or need extra help, these tips will ensure your home looks spotless and ready for the new year.

Quick Cleaning Solutions for Spills and Messes

image of spilled coffee

Keeping your home spotless is often easier said than done, especially when unexpected spills and messes happen. Whether it’s a knocked-over coffee cup, muddy footprints, or a food stain on your carpet, quickly tackling these mishaps can save time and prevent permanent damage. You can maintain a clean and tidy space without stress with the right tools, techniques, and a little know-how. Here are the best quick cleaning solutions for common spills and messes.

1. Coffee and Tea Spills

Coffee and tea are among the most common culprits of spills, and they can leave unsightly stains on carpets, upholstery, and clothing. The key is to act fast before the liquid sets into the fibers.

Quick Solution:

  • Blot, Don’t Rub: Use a clean, dry cloth or paper towel to gently blot the spill, absorbing as much liquid as possible. Avoid rubbing, as this can push the stain deeper into the fabric.
  • DIY Cleaner: Mix one tablespoon of liquid dish soap, white vinegar, and two cups of warm water. Apply this solution to the stain using a clean cloth, then gently dab the area.
  • Rinse and Dry: After treating the stain, rinse the area with cold water and pat it dry with a towel. If the stain persists, repeat the process.

For clothing, soak the stained garment in cold water with a splash of detergent for 30 minutes before laundering as usual.

2. Food Stains on Carpets and Upholstery

Whether it’s spaghetti sauce, curry, or ketchup, food stains on carpets and upholstery can be tricky to clean. Acting quickly minimizes the risk of permanent discolouration.

Quick Solution:

  • Scrape Excess Food: Use a blunt knife or spoon to lift solid bits of food off the surface gently.
  • Treat the Stain: Mix equal parts dish soap and water, then dab the stained area with a clean cloth. For stubborn stains, sprinkle baking soda over the area to absorb grease or oils.
  • Rinse and Vacuum: After treating the stain, rinse with clean water and let it air dry. Once the area is dry, vacuum up any residue.

Hydrogen peroxide (diluted with water) can work wonders on persistent stains for light-coloured fabrics. Test it on an inconspicuous area first to ensure it doesn’t bleach the material.

image of red wine spill

3. Red Wine Spills

Red wine spills often feel like a cleaning nightmare, but they don’t have to be. You can remove the stain with a few simple steps before it sets.

Quick Solution:

  • Act Immediately: Blot the spill with a paper towel or cloth to soak up as much wine as possible.
  • Apply Salt: Sprinkle table salt generously over the stain to absorb the liquid. Let it sit for 15-20 minutes, then vacuum it up.
  • Stain Treatment: Mix one part hydrogen peroxide with dish soap, apply it to the stain, and gently dab. Allow the solution to sit for 10 minutes, then rinse with cold water.

Club soda is an excellent alternative to salt and peroxide for delicate fabrics.

4. Greasy Kitchen Spills

Cooking oil, butter, and grease splatters are unavoidable in the kitchen. Left unattended, they can create stubborn stains and slippery surfaces.

Quick Solution:

  • Absorb the Grease: Sprinkle baking soda, cornstarch, or talcum powder over the spill to soak up excess oil. Let it sit for 10 minutes, then wipe it away with a damp cloth.
  • Clean with Dish Soap: Mix a small dish soap with warm water. Use a sponge or cloth to scrub the affected area. Dish soap is particularly effective for cutting through grease.
  • Finish with Vinegar: For stubborn, greasy stains, spray a solution of equal parts vinegar and water onto the surface. Wipe it clean to restore a spotless finish.

Avoid abrasive cleaners on delicate surfaces like granite or marble to prevent damage.

image of stepping in mud

5. Muddy Footprints and Dirt

Rainy days often mean muddy shoes and dirty footprints on your floors or carpets. While it may seem overwhelming, this mess is easy to tackle with the right approach.

Quick Solution:

  • Let It Dry: Allow muddy footprints to dry completely before cleaning. Trying to clean wet mud can spread the mess further.
  • Vacuum First: Once dry, vacuum up as much dirt as possible. Use the brush attachment to lift debris from carpets.
  • Spot Clean: Mix warm water with a small amount of dish soap. Use a cloth or sponge to clean the stained area, working gently in circular motions.
  • Rinse and Dry: Wipe the area with clean water and pat it dry.

Place a doormat outside and inside your front door to prevent muddy shoes from entering your home.

6. Sticky Spills (Syrup, Honey, or Juice)

Sticky spills like syrup and honey can be a hassle, as they attract dirt and leave surfaces feeling grimy. Cleaning them quickly prevents further mess.

Quick Solution:

  • Scrape and Wipe: Use a butter knife to remove excess syrup or honey. Wipe the area with a damp cloth to loosen the residue.
  • Vinegar Solution: Mix white vinegar and water equally to dissolve the stickiness. Spray the solution on the spill, let it sit for a minute, then wipe clean.
  • Finish with Warm Water: Rinse the area with warm water to ensure no sticky residue remains.

Avoid over-wetting the area for wooden surfaces to prevent damage. Instead, use a barely damp cloth for cleaning.

cat looking at you

7. Pet Accidents

Pet accidents are a reality for pet owners, and addressing them quickly is crucial to avoid odors and stains.

Quick Solution:

  • Blot Immediately: Use paper towels to absorb as much of the mess as possible.
  • Neutralize Odors: Mix equal parts vinegar and water, then spray the area. Let it sit for 5-10 minutes to break down the odor.
  • Treat the Stain: Sprinkle baking soda over the area after applying the vinegar solution. Vacuum it up once dry.
  • Use Enzymatic Cleaners: For persistent odors, enzymatic cleaners break down pet waste and eliminate lingering smells.

Avoid using ammonia-based cleaners, as they can mimic the smell of urine and encourage repeat accidents.

Final Thoughts

Spills and messes are inevitable in everyday life, but knowing how to clean them efficiently makes all the difference. You can keep your home spotless and fresh by acting quickly and using the proper techniques and cleaning solutions.

Invest in essential cleaning supplies, stay prepared, and remember that consistency is key to a clean, stress-free living environment. When all else fails, it’s good to get a little help by calling in the professionals to help you out.

Make Cleaning Fun Again (For Everyone At Home)

kids playing pillow fight

Cleaning often feels tedious, but it doesn’t have to be. With creativity and teamwork, you can turn household cleaning into an enjoyable activity for the entire family. By making cleaning fun, you’ll get the job done faster and foster a sense of responsibility and cooperation at home. Here’s how you can transform your cleaning routine into an exciting and rewarding experience for everyone.

Turn Cleaning into a Game

Games are an excellent way to make cleaning fun for everyone, especially kids. Incorporate these ideas to bring an element of play into your cleaning routine:

  • Speed Cleaning Contests: Set a timer and challenge family members to clean as much as possible in a specific area before the time runs out. Whoever cleans the most wins a small reward.
  • Treasure Hunt: Hide small rewards or notes in areas that need cleaning. As your family cleans, they’ll uncover these hidden surprises, adding excitement to the process.
  • Points System: Create a points chart where every cleaning task earns points. Accumulate points over a week and reward the person with the highest score with something they enjoy.

Play Music While Cleaning

Music can significantly boost motivation and make cleaning more enjoyable. Create a cleaning playlist with upbeat tracks that energize everyone. Let each family member take turns choosing their favorite songs to keep the atmosphere lively and inclusive. You can even turn cleaning into a mini dance party, combining movement and productivity.

Break Tasks into Smaller Chunks

Tackling an entire house at once can feel overwhelming. Breaking tasks into smaller, manageable chunks makes cleaning less daunting and fun. Assign specific tasks or rooms to each family member and set achievable goals. This method ensures that everyone stays motivated and feels a sense of accomplishment when their part is complete.

Use Colorful and Fun Cleaning Tools

Invest in colorful, quirky cleaning tools that bring a smile to everyone’s face. From bright-colored dusters to mop heads shaped like cartoon characters, fun tools can make cleaning less of a chore and more enjoyable. Let kids pick their favorite tools to encourage participation.

girls giggling

Incorporate Learning Opportunities

Turn cleaning into an educational experience for kids by incorporating learning opportunities. For instance:

  • Math Practice: Ask children to count the items they’ve organized or calculate the time taken to clean a specific area.
  • Science Fun: Explain how certain cleaning products remove dirt or disinfect surfaces.
  • Responsibility Lessons: Teach them the importance of maintaining a clean environment and how it impacts health and well-being.

Create a Reward System

A reward system can work wonders in motivating everyone to participate in cleaning. Rewards don’t have to be extravagant; simple treats like a movie night, ice cream, or an extra hour of screen time can be highly effective. Clearly outline the tasks and the rewards associated with completing them to encourage active participation.

Involve the Entire Family

Cleaning doesn’t have to be a solo task. Involving everyone in the household creates a sense of teamwork and shared responsibility. Assign age-appropriate tasks to each member, ensuring everyone contributes. For example, younger children can pick up toys while older kids can vacuum or wipe surfaces. Working together makes the process faster and strengthens family bonds.

Rotate Roles for Variety

Repetition can make cleaning boring, so keep things interesting by rotating roles. For instance, one person could dust one week while another mops. Switching tasks allows everyone to try something new and avoids monotony.

Use Technology to Your Advantage

Technology can make cleaning more engaging and efficient. Consider these tech-savvy options:

  • Robot Vacuums: Let kids control or supervise a robot vacuum as it cleans.
  • Cleaning Apps: Use apps that gamify chores and track progress.
  • YouTube Tutorials: Watch quick cleaning hacks or challenges online to learn new techniques.

Focus on the Positive Outcomes

Remind everyone of the benefits of a clean home, such as better health, improved mood, and a more inviting living space. Highlighting these positives can help shift the perception of cleaning from a chore to a rewarding activity.

Host Cleaning Challenges

Make cleaning competitive by hosting challenges like:

  • Tidy-Up Relay: Divide the family into teams and assign each a specific area to clean. The team that finishes first wins.
  • Before-and-After Photos: Take photos of messy areas before cleaning and compare them to the sparkling results. This visual satisfaction can be incredibly motivating.

Celebrate Small Wins

Acknowledge and celebrate every milestone, no matter how small. Whether it’s finishing a room or organizing a closet, celebrating achievements keeps spirits high. A quick celebratory snack or a moment of appreciation goes a long way in maintaining enthusiasm.

Teach Kids Responsibility

For parents, cleaning can be an excellent opportunity to teach children responsibility. Explain the importance of cleaning up after themselves and maintaining their personal spaces. Use a reward system to reinforce positive habits, such as making their beds or keeping their toys organized.

Declutter First

Decluttering is an essential step before cleaning. Make it a fun activity by challenging family members to find items they no longer need. Set up a donation box and encourage everyone to contribute. Knowing their items will benefit someone in need adds a meaningful touch to the process.

Embrace Seasonal Themes

Seasonal cleaning themes can add a festive twist to your routine. For example:

  • Spring Cleaning: Focus on refreshing your home with floral-scented cleaning products and bright colors.
  • Holiday Cleanup: Turn post-holiday cleaning into a cheerful activity by playing festive music or wearing themed accessories.

Final Thoughts

Making cleaning fun for everyone at home is all about creativity, teamwork, and positivity. By incorporating games, music, rewards, and learning opportunities, you can transform a mundane chore into an enjoyable bonding experience. Not only will your home stay clean, but you’ll also create lasting memories with your loved ones. Start implementing these strategies today, and watch as cleaning becomes less of a task and more of a joyful activity for everyone.

How to Maintain a Fresh-Smelling Home During the Festive Season

image of festive season in a home

‘Tis the season to keep your home smelling clean, fresh, and festive! It brings joy, celebrations, and many guests into our homes. However, with all the cooking, gatherings, and general hustle, it’s easy for unwanted odors to linger, affecting the fresh ambiance you’ve worked hard to create. Maintaining a fresh-smelling home during the festive season is not just about masking smells; it’s about tackling the sources and creating an inviting atmosphere for your guests. Here’s some tips to make your home fresh-smelling during this festive season.

1. Deep Clean Before the Festivities Begin

To start on a clean slate, give your home a thorough, deep clean before the celebrations. Dust, dirt, and grime can contribute to stale odors that worsen when the house is filled with people, food, and decorations.

Focus on High-Traffic AreasClean the living room, kitchen, and bathrooms, as these areas are most frequently used.
Vacuum and Mop FloorsDon’t forget to clean carpets, rugs, and hard-to-reach corners where dust and food crumbs may hide.
Refresh Upholstery and CurtainsFabrics trap odors easily. Wash or steam-clean curtains, sofa covers, and cushions to eliminate lingering smells.
DeclutterRemoving unnecessary items can help improve airflow in your home and reduce musty smells.

Hiring a professional cleaner for pre-holiday deep cleaning can save time and ensure your home is spotless and odor-free.

2. Use Natural Air Fresheners

Ditch synthetic sprays and embrace natural, chemical-free ways to keep your home smelling amazing. Natural air fresheners improve air quality and add a festive charm to your space.

Simmer PotBoil a pot of water and add slices of oranges, lemons, cinnamon sticks, cloves, and star anise. The steam will fill your home with a delightful, festive scent.
Essential Oil DiffusersInvest in an essential oil diffuser and use scents like lavender, peppermint, eucalyptus, or orange to create a soothing and fresh-smelling environment.
Baking Soda MagicPlace bowls of baking soda in various rooms to neutralize odors naturally. You can also sprinkle baking soda on carpets before vacuuming for extra freshness.
image of a kitchen

3. Keep the Kitchen Odor-Free

The kitchen is the heart of festive celebrations but can also be the primary source of unpleasant smells. Grease, food spills, and trash buildup can quickly create an unwelcoming atmosphere.

Clean as You CookWipe down counters, wash dishes, and take out the trash regularly to prevent odors from building up.
Maintain Garbage BinsUse scented bin liners, and sprinkle baking soda or a few drops of essential oil at the bottom of your trash bin to absorb smells.
Ventilate the KitchenTurn on the exhaust fan or open windows while cooking to allow proper airflow and remove lingering food odors.
Freshen Up the FridgePlace an open box of baking soda in the fridge to absorb food odors. Wipe down shelves and discard expired items before the holidays begin.

4. Proper Ventilation and Air Circulation

Proper ventilation is key to keeping your home fresh, especially when guests come in and out and cooking is in full swing. Poor air circulation can trap odors, making your home feel stuffy.

Open WindowsLet fresh air in regularly, even for 10-15 minutes. This simple step can remove and replace stale indoor air with clean, crisp air.
Use Ceiling FansSet ceiling fans to circulate air, which helps disperse lingering odors and keeps the room airy.
Maintain Your AirconIf you run the aircon during gatherings, ensure it’s serviced and cleaned. A dirty aircon can blow out musty odors and affect air quality.

Consider scheduling a professional aircon servicing before the festive season to ensure it operates efficiently and contributes to a fresh environment.

5. Add Fresh Festive Touches

Creating a fresh-smelling home doesn’t always mean focusing solely on removing odors. Adding festive elements that naturally smell good can also enhance the overall ambiance of your space.

Festive CandlesScented candles with notes of cinnamon, pine, vanilla, or cranberry can infuse your home with a warm and festive aroma.
Fresh Flowers and PlantsDisplay bouquets of fresh flowers like lilies or roses for a pleasant and natural scent. Indoor plants like peace lilies or snake plants also help purify the air.
Scented PineconesSoak pinecones in cinnamon oil or essential oils and place them in decorative bowls. They’ll add a festive charm while keeping the air fresh.
dog sulking at home

6. Manage Pet Odors

Pets are part of the family, but their presence can sometimes introduce unwanted smells, especially during the festive season when you have guests over.

Clean Pet AreasRegularly wash pet beds, blankets, and toys to keep odors at bay.
Groom Your PetsGive your pets a quick bath or grooming session before celebrations to ensure they are clean and odor-free.
Neutralize OdorsUse enzyme-based odor removers to promptly clean up any pet accidents. Place air purifiers in rooms where pets spend the most time.

7. Keep Bathrooms Fresh

Bathrooms are another high-traffic area during festive gatherings. A clean, fresh bathroom ensures your guests feel comfortable and gives a good impression.

Use Air Fresheners or DiffusersPlace essential oil diffusers or scented sprays in the bathroom to keep it smelling clean.
Replace Towels FrequentlyFresh towels look better and reduce musty odors. Add festive-themed towels for a welcoming touch.
Deep Clean Toilets and SinksRegularly scrub toilets, sinks, and floors to prevent grime buildup. Consider using bleach or vinegar for an effective clean.
Add VentilationKeep bathroom windows open or install an exhaust fan to prevent dampness and odors caused by humidity.

Final Thoughts

Maintaining a fresh-smelling home during the festive season doesn’t have to be a daunting task. By deep cleaning beforehand, ventilating properly, using natural air fresheners, and adding festive touches, you can create an inviting space for your guests. Whether you’re hosting family, friends, or both, a clean and fragrant home will leave a lasting impression and elevate the festive atmosphere.

If you’re short on time, don’t hesitate to engage a professional cleaner for a stress-free and spotless home. With these tips, your home will look clean and smell amazing, ensuring everyone enjoys a refreshing and memorable festive season.

How to Clean and Disinfect Electronics Safely

touching a screen

Electronics have become indispensable in our daily lives, but they’re also some of the most frequently touched items, making them hotspots for germs and bacteria. Whether it’s your smartphone, laptop, or remote control, keeping these devices clean and disinfected is essential for your health and to ensure their longevity. However, cleaning electronics requires special care to avoid damaging sensitive components. Here’s a comprehensive guide on how to clean and disinfect your electronics safely.

Why Cleaning and Disinfecting Electronics Is Important

Electronics accumulate dust, fingerprints, and oils over time. They can also harbor harmful bacteria and viruses, especially in shared spaces or during flu season. Regular cleaning not only promotes hygiene but also ensures optimal device performance.

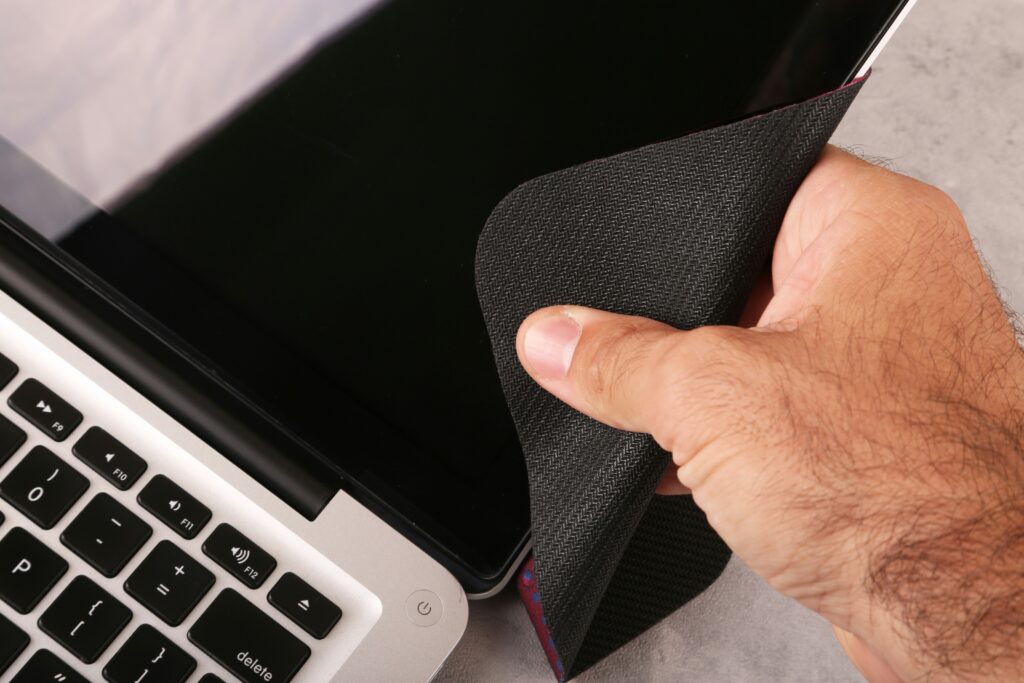
using a microfiber cloth to wipe a laptop screen

Essential Tools and Materials

Before starting, gather the following tools and materials:

  • Microfiber Cloths: Soft and lint-free, perfect for delicate surfaces.
  • Isopropyl Alcohol (70%): A safe disinfectant that evaporates quickly.
  • Distilled Water: Prevents mineral deposits on screens and surfaces.
  • Cotton Swabs: Useful for hard-to-reach areas.
  • Compressed Air Can: Removes dust from tight spaces.
  • Cleaning Wipes: Ensure they are electronics-safe and alcohol-based.
  • Small Brush: A soft-bristled brush can clean between keys and crevices.

Step-by-Step Guide to Clean and Disinfect Electronics

1. Power Down and Unplug

Always turn off and unplug your device before cleaning. This reduces the risk of electrical shock and prevents damage to the internal components.

2. Dust Removal

  • Use a soft microfiber cloth or a small brush to remove loose dust and debris from the surface.
  • For keyboards, ports, and other crevices, use a can of compressed air to blow away dust particles. Hold the can upright and use short bursts to avoid condensation.

3. Screen Cleaning

  • Create a 1:1 solution of isopropyl alcohol and distilled water.
  • Lightly dampen a microfiber cloth with the solution—never spray directly onto the screen.
  • Wipe the screen gently in a circular motion to remove fingerprints, smudges, and grime.
  • For touchscreens, use electronics-safe cleaning wipes if you prefer a ready-made option.

4. Disinfecting Keyboards and Remote Controls

  • Dip a cotton swab in isopropyl alcohol and run it between the keys or buttons to disinfect hard-to-reach areas.
  • Wipe down the surface with a slightly damp microfiber cloth.
  • Let the device air dry completely before plugging it back in or turning it on.

5. Cleaning Smartphone and Tablet Cases

  • Remove the case and clean it separately.
  • Wash with warm, soapy water for silicone and plastic cases, then disinfect with isopropyl alcohol.
  • For leather cases, use a leather-safe cleaner followed by a disinfectant.

6. Headphones and Earbuds

  • Gently clean the ear tips and outer casing with a damp microfiber cloth.
  • Use a dry cotton swab to remove wax or debris from small openings like the mesh or charging port.
  • Wipe down the cords and connectors with isopropyl alcohol.

7. Ventilation Areas

  • Use compressed air to clean vents on laptops, desktops, and gaming consoles. This prevents overheating and ensures efficient airflow.
  • Avoid using liquids near vents to prevent moisture from seeping into internal components.
woman using a laptop

Do’s and Don’ts for Cleaning Electronics

Do’s:

  • Use only recommended cleaning solutions like isopropyl alcohol or distilled water.
  • Ensure cloths and swabs are only slightly damp, not soaking wet.
  • Allow devices to air dry thoroughly before turning them back on.

Don’ts:

  • Never use harsh chemicals like ammonia or bleach on electronics.
  • Avoid spraying liquids directly onto devices.
  • Don’t use abrasive materials like paper towels that can scratch screens.

How Often Should You Clean Electronics?

The frequency depends on the device and its usage:

  • Smartphones: Daily cleaning is recommended, as they are frequently touched.
  • Keyboards and Mice: Clean weekly or more often if shared.
  • Remote Controls: Disinfect every few days, especially in households with children or during flu season.
  • Laptops and Monitors: Wipe down every one to two weeks.

Final Thoughts

When push comes to shove, it’s better to opt for professional cleaning for heavily soiled devices or those with internal dust buildup. This is especially true for desktops, gaming consoles, or laptops with cooling systems.

Cleaning and disinfecting your electronics extends their lifespan and promotes a healthier living and working environment. You can enjoy streak-free screens, responsive keyboards, and germ-free devices with proper techniques and regular maintenance.