How to Remove Hard Water Stains from Kitchen Fixtures

image of a kitchen

Hard water stains are common in kitchens, especially around fixtures like faucets and sinks. In hard water, these unsightly spots are caused by mineral buildup, typically calcium and magnesium. Over time, these minerals leave a chalky residue that can dull the shine of your fixtures, and if not treated, these stains can become more difficult to remove.

Fortunately, there are several effective methods to tackle complex water stains and restore the sparkle to your kitchen. Here’s an expanded guide on the best ways to get rid of these stains and some preventative tips to help keep them from reappearing.

Understanding Hard Water Stains

Before jumping into the cleaning methods, it’s helpful to understand what hard water stains are. Hard water contains high levels of minerals like calcium, magnesium, and iron. When water evaporates, it leaves behind mineral deposits that form white, chalky stains, commonly on sinks, faucets, and other fixtures exposed to water. If left untreated, these stains can also lead to limescale buildup, damaging fixtures and reducing water flow. Regular cleaning is essential to prevent hard water stains from hardening and becoming more challenging.

Effective Methods to Remove Hard Water Stains

1. Vinegar and Water Solution

Vinegar is a natural and effective solution for breaking down mineral deposits. The acidity in vinegar dissolves calcium buildup and helps remove stains with ease. Here’s how to use it:

Step 1: Mix equal white vinegar and water in a spray bottle.

Step 2: Spray the solution generously on the stained areas.

Step 3: Let it sit for 5-10 minutes to allow the vinegar to dissolve the mineral deposits.

Step 4: Wipe the area with a soft cloth or sponge.

Step 5: Rinse with water and dry thoroughly to prevent future stains.

For tougher stains, you can soak a cloth in vinegar and wrap it around the faucet or handle, leaving it for up to 30 minutes before scrubbing. This method is safe for most metal fixtures and doesn’t require harsh chemicals.

2. Baking Soda Paste

Baking soda is a gentle abrasive and can help scrub stubborn hard water stains without damaging surfaces.

Step 1: Mix baking soda with a small amount of water to create a thick paste.

Step 2: Apply the paste directly to the stained areas, focusing on areas with heavier buildup.

Step 3: Gently scrub the area with a soft-bristled brush or sponge.

Step 4: Rinse thoroughly and dry the fixture to prevent future stains.

This method works well for stainless steel and other resilient surfaces in the kitchen. Avoid scrubbing too hard, even gentle abrasives can dull certain finishes with excessive pressure.

image of someone squeezing fresh lemon juice into a glass

3. Lemon Juice and Salt

Lemon juice is acidic and effective at breaking down mineral deposits. Combined with salt, it can create a natural abrasive for tackling tough stains.

Step 1: Cut a lemon in half and sprinkle salt on the cut side.

Step 2: Rub the lemon and salt mixture directly onto the stained areas.

Step 3: Allow it to sit for a few minutes to let the acidity in the lemon break down the buildup.

Step 4: Rinse with water and wipe dry.

Lemon juice not only removes stains but also leaves a fresh scent. This method is especially useful for smaller, hard-to-reach areas on faucets and handles.

4. Using Commercial Cleaners

Commercial lime and rust removers can be highly effective for particularly stubborn stains. These products are designed to dissolve mineral buildup and are often found at hardware stores.

Step 1: Apply the cleaner to the stained area as directed on the product label.

Step 2: Let it sit for the recommended time (usually a few minutes).

Step 3: Scrub with a brush or sponge and rinse thoroughly.

Be sure to use gloves when handling these products and ensure proper ventilation, as many contain chemicals that irritate skin or cause fumes.

image of toothpaste on a toothbrush

5. Toothpaste Trick for Small Fixtures

Surprisingly, toothpaste can also be effective for more minor stains on faucets and handles, especially when they aren’t too large.

Step 1: Apply a small amount of toothpaste to a damp cloth.

Step 2: Rub it gently on the stained area.

Step 3: Rinse and wipe dry.

Toothpaste is a mild abrasive and can bring back shine to chrome and stainless steel fixtures.

Preventing Hard Water Stains in the Future

Once you’ve cleaned your kitchen fixtures, taking preventative measures can help reduce future staining:

  • Dry Fixtures After Use: Wiping down sinks, faucets, and countertops with a dry cloth after use can help prevent mineral deposits from forming as the water evaporates.
  • Install a Water Softener: If your home has tough water, installing a water softener can reduce the mineral content, helping to minimize hard water stains throughout your kitchen and bathroom.
  • Use a Protective Coating: Apply a protective coating, like a wax or specialized surface protectant, to your fixtures to create a barrier against mineral deposits. This can reduce the cleaning frequency and extend your fixtures’ lifespan.
  • Regular Maintenance: Cleaning your kitchen fixtures weekly with a mild cleaner can help prevent buildup. Regularly wiping surfaces down prevents stains from becoming harder to remove.

Final Thoughts

Keeping your kitchen fixtures free from hard water stains requires regular cleaning and preventative care. Simple household items like vinegar, baking soda, and lemon juice can remove even the toughest stains while avoiding harsh chemicals. Drying and maintaining fixtures can also extend their life, reduce the need for deep cleaning, and keep your kitchen looking spotless.

Consider these tips and routines as part of your regular kitchen cleaning habits, and you’ll find it easier to manage hard water stains in the long run. If you find the stains particularly tough or widespread, consulting with a professional cleaning service might be worthwhile to help restore your fixtures. With consistent care, your kitchen can stay gleaming and stain-free year-round!

The Ultimate Pest Prevention Guide For A Cleaner Home

image of a pest

Although unheard of in Singapore, pests are a common issue here for homeowners and businesses alike, and effective prevention can save time, money, and headaches. From cockroaches to rodents, termites to ants, pests can compromise health, damage property, and make spaces uncomfortable. To keep your space pest-free, adopting a comprehensive prevention strategy that tackles common pest entry points, breeding areas, and attractants is essential. Here’s your ultimate guide to pest prevention, packed with practical tips and expert insights.

yellow caulk in between tiles

1. Seal All Entry Points

Small cracks, gaps, and openings provide entry points for pests such as ants, cockroaches, and rodents. Sealing these gaps denies pests access to your home and minimizes the chance of an infestation.

What to do:

  • Inspect doors, windows, and walls for cracks or gaps, especially around utility pipes and cables.
  • Use caulk or weatherstripping to seal any openings.
  • Install door sweeps at the base of exterior doors to block rodents and insects.
  • Repair torn window screens and ensure vents are covered with mesh.

2. Keep a Clean Kitchen and Dining Area

Food crumbs and spills attract pests, especially ants, cockroaches, and rodents. Maintaining cleanliness where food is prepared and consumed is critical to pest prevention.

What to do:

  • Wipe down countertops, dining tables, and floors after meals.
  • Store food in airtight containers to prevent access.
  • Take out the trash regularly and use a bin with a lid to deter pests.
  • Clean under appliances and in corners where crumbs might accumulate.
  • Wash dishes promptly to avoid attracting pests.

3. Remove Standing Water Sources

Mosquitoes, termites, and cockroaches thrive in damp environments. Standing water provides an ideal breeding ground for mosquitoes, while moist areas around the home can attract other pests.

What to do:

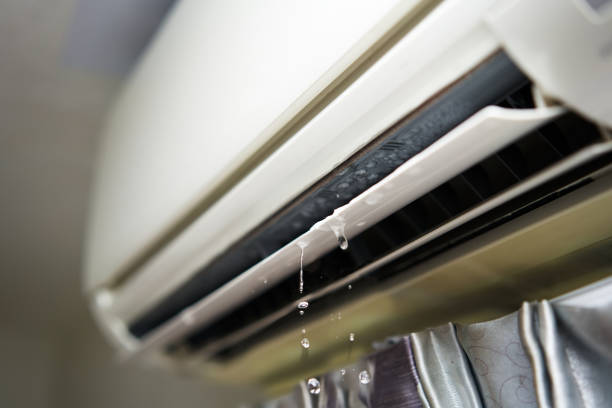
  • Fix any leaky faucets, pipes, or air conditioning units.
  • Regularly empty and clean pet water bowls and plant saucers.
  • Ensure that gutters and downspouts direct water away from your home.
  • Consider using a dehumidifier in damp basements and keep bathrooms well-ventilated.
trash lined up infront of houses

4. Dispose of Garbage Properly

Garbage attracts a variety of pests, from rodents to flies. Proper disposal and regular bin cleaning minimize the chances of pests taking up residence near your home.

What to do:

  • Use sturdy, lidded garbage bins, both indoors and outdoors.
  • Empty indoor bins daily and ensure outdoor bins are regularly collected.
  • Clean bins regularly with disinfectant to remove food residue and odors.
  • Keep garbage areas away from entry points to limit pest attraction to your home.

5. Maintain Your Garden and Outdoor Area

Overgrown plants, standing water, and debris can harbor pests that eventually make their way indoors. Proper outdoor space maintenance is essential to controlling pest populations.

What to do:

  • Trim shrubs, grass, and trees regularly to reduce hiding spots for pests.
  • Avoid planting shrubs directly against the exterior walls of your home.
  • Remove any stagnant water, such as bird baths or unused planters.
  • Keep firewood and debris away from the home’s exterior walls to reduce shelter for rodents and termites.

6. Store Firewood and Outdoor Items Properly

If not properly stored, firewood piles, garden tools, and outdoor furniture can attract termites, ants, and other pests. Placing these items near your home increases the likelihood that pests will find a way indoors.

What to do:

  • Store firewood off the ground and at least 20 feet from the home.
  • Regularly inspect and clean outdoor items before bringing them inside.
  • Use covered storage areas for tools and equipment to deter nesting.
dry pantry area

7. Practice Safe Food Storage

Improperly stored food invites pests such as ants, cockroaches, and rodents into pantries and cabinets. Good food storage practices help prevent access and reduce pest attraction.

What to do:

  • Keep food items in tightly sealed containers, especially grains, flour, and snacks.
  • Regularly inspect pantry shelves and cabinets for any spilled or expired food.
  • Avoid leaving pet food out overnight, as it can attract rodents and insects.

8. Schedule Regular Inspections

Professional inspections can help detect early signs of infestations, identify vulnerable areas, and provide targeted treatments to keep your home pest-free. Regular inspections are beneficial for spotting hidden infestations, such as termites and rodents, before they cause significant damage.

What to do:

  • Schedule annual pest inspections with a reputable pest control company.
  • Have specialists inspect common problem areas such as basements, attics, and crawl spaces.
  • Follow up with necessary treatments if any pest activity is detected.
wide range of essential oils

9. Use Natural Repellents

Natural repellents can effectively deter pests without introducing harmful chemicals into your home. They are often safer for households with pets or young children and complement other pest control methods.

What to do:

  • Use essential oils like peppermint, tea tree, and eucalyptus to deter ants, spiders, and mosquitoes.
  • Sprinkle diatomaceous earth around entry points and areas where pests are seen; it is effective against insects such as cockroaches and ants.
  • Plant pest-repelling herbs like basil, rosemary, and lavender near entry points to naturally ward off insects.

10. Prevent and Control Indoor Humidity

Humid environments attract pests, especially cockroaches and silverfish. Controlling humidity levels in your home helps prevent infestations and makes the space less attractive to moisture-loving pests.

What to do:

  • Use dehumidifiers in humid areas like basements and bathrooms.
  • Ensure adequate ventilation in rooms prone to moisture buildup.
  • Clean and maintain ventilation systems to reduce humidity.
  • Fix leaks promptly and dry out any areas affected by water damage.

11. Educate Your Household

Consistent pest prevention requires everyone in the household to be mindful of their habits. Simple actions like closing doors, disposing of food waste, and cleaning up spills contribute significantly to a pest-free environment.

What to do:

  • Establish and communicate household rules for food storage, cleaning, and trash disposal.
  • Encourage family members to clean up after themselves and practice good hygiene.
  • Educate children on the importance of not leaving food out or touching walls, where they might inadvertently introduce pests.

Final Thoughts

Pest prevention involves a combination of simple daily practices, good hygiene, and regular indoor and outdoor maintenance. You can create a clean, pest-free home by understanding what attracts pests and implementing effective strategies to control these attractants. While DIY methods and natural repellents are helpful, professional inspections and treatments are vital for ensuring long-term pest control, especially in pest-prone regions like Singapore. You could also go the extra mile by hiring additional help by getting a part-time cleaner to help you out!

A pest-free home isn’t just about comfort — it’s about ensuring a healthy environment for you and your family.

How to Clean Stainless Steel Appliances Without Streaks

image of stainless steel appliance

Cleaning stainless steel appliances without leaving streaks can be a challenge. Stainless steel is famous for its sleek, modern appearance but tends to show smudges, fingerprints, and water stains. With the right approach and cleaning methods, you can keep your stainless steel appliances pristine. Here’s a guide on how to clean stainless steel appliances without leaving streaks.

Why Stainless Steel Shows Streaks

Due to its reflective finish, stainless steel’s unique surface quickly shows streaks. Fingerprints, water stains, and even the wrong cleaning method can cause streaks. Using the right cleaning products and techniques is essential to achieving a streak-free shine.

1. Use Dry Microfiber Cloth

Using a dry microfiber cloth is an excellent first step for basic cleaning. Microfiber is gentle on stainless steel and won’t scratch the surface. It’s also effective at wiping away dust, fingerprints, and light smudges without additional product. Start by wiping down the appliance toward the grain, which will help avoid streaks.

Tip: Always follow the direction of the stainless steel grain to prevent scratches and streaks.

2. Use White Vinegar

White vinegar is a fantastic, non-toxic cleaner for stainless steel. It has natural antibacterial properties and helps break down grease and grime without leaving streaks.

  • How to Use: Pour white vinegar into a spray bottle and lightly mist the stainless steel surface. Wipe down the surface with a microfiber cloth, following the grain. The vinegar will cut through any residues, leaving a clean surface.
  • Extra Shine: After using vinegar, you can go over the area again with a dry microfiber cloth for a streak-free shine.

Benefits: White vinegar is affordable, natural, and effective for removing streaks.

image of olive oil

3. Apply a Small Amount of Olive Oil or Mineral Oil

Using a small amount of olive or mineral oil can enhance the appearance of stainless steel by adding shine and reducing the appearance of streaks.

  • How to Apply: Put a few drops of oil on a microfiber cloth and gently buff the stainless steel surface toward the grain.
  • Wipe Off Excess: Be careful not to use too much oil, which can leave a residue. After applying, wipe the surface with a clean, dry microfiber cloth to remove any excess.

Benefits: Oils provide a natural, non-streaky shine and can help prevent fingerprints.

4. Try Dish Soap and Warm Water for Tough Stains

For more stubborn stains or grime, dish soap mixed with warm water is a safe and effective cleaner for stainless steel.

  • How to Use: Mix a few drops of mild dish soap with warm water and dip a microfiber cloth into the solution. Wipe the stainless steel surface following the grain, rinse the fabric with water and wipe off any soap residue.
  • Dry Thoroughly: After cleaning, use a dry microfiber cloth to wipe the surface, which helps prevent water streaks.

Benefits: Dish soap is gentle, affordable, and effective for tougher messes on stainless steel.

5. Use Commercial Stainless Steel Cleaners

If you prefer commercial products, there are cleaners specifically formulated for stainless steel designed to clean without streaking. Look for products labelled “streak-free” and made of stainless steel.

  • How to Use: Spray a small amount of cleaner on a microfiber cloth or directly on the appliance. Wipe down the surface, following the grain of the stainless steel.
  • Buffing: After wiping, buff the area with a clean, dry microfiber cloth to remove any residue and enhance the shine.

Tip: Always read the manufacturer’s instructions and test a small area first to ensure the cleaner doesn’t cause unwanted effects.

image of baking soda

6. Baking Soda for Spot Cleaning Tough Stains

Baking soda is a gentle abrasive that will not scratch stainless steel, making it ideal for tougher stains such as water spots or grime.

  • How to Use: Mix baking soda and water to make a paste, apply it to a soft cloth, and gently rub the stain in the direction of the grain.
  • Rinse and Dry: After cleaning, wipe off the paste with a damp cloth and dry thoroughly with a microfiber cloth.

Benefits: Baking soda is non-toxic and effective at removing tough stains, making it perfect for spot cleaning.

7. Avoid Harsh Chemicals and Steel Wool

Avoid harsh chemicals and abrasive cleaning tools on stainless steel to maintain a streak-free shine.

  • No Bleach or Chlorine: Bleach and chlorine can damage stainless steel’s finish, leading to discoloration and streaks.
  • Avoid Steel Wool. Steel wool or other abrasive materials can scratch the surface, causing more streaks and ruining stainless steel’s sleek finish.

Alternative: Stick with mild cleaners like vinegar, dish soap, and baking soda to keep your stainless steel looking new.

8. Polish with a Glass Cleaner for a Mirror-Like Finish

After cleaning, glass cleaners can add extra polish for a mirror-like shine on stainless steel appliances.

  • How to Use: Spray a small amount of ammonia-free glass cleaner onto a microfiber cloth and wipe the surface toward the grain.
  • Buff with a Dry Cloth: Use a clean, dry microfiber cloth to remove any streaks, leaving a shiny, polished finish.

Tip: Glass cleaner works well for final polishing but should differ from your regular cleaning routine.

9. Prevent Streaks by Cleaning Regularly

Regular maintenance can help prevent streaks from forming on stainless steel appliances.

  • Daily Wipe Down: Quickly wipe down your stainless steel with a dry microfiber cloth daily to remove fingerprints and smudges.
  • Weekly Deep Clean: Use vinegar, dish soap, or baking soda weekly to keep grime from building up and creating tougher stains that are harder to clean.

Benefits: Regular cleaning keeps stainless steel looking good and prevents the need for harsh scrubbing, which can cause streaks. You can also opt for professional cleaning services if you’re unable to clean regularly.

Final Thoughts

Using the proper techniques and products, keeping your stainless steel appliances streak-free is easy. By sticking to natural cleaners like vinegar, oils, and baking soda and avoiding harsh chemicals, you’ll preserve the shine and beauty of your stainless steel for years to come. Incorporating these simple cleaning practices into your routine will help you maintain a spotless, streak-free finish that keeps your kitchen looking polished and professional.

Regular cleaning, along with occasional polishing, enhances the appearance and extends the life of stainless steel appliances.

9 Top Reasons For Regular Aircon Chemical Wash

Portrait Of Smiling Young Woman Holding Remote Controller Of Air Conditioner At Home

Living in the tropics, especially in places with high humidity and temperature like Singapore, aircon is more than a luxury — it’s a necessity. However, running aircon units frequently can cause them to accumulate dust, dirt, mold, and other contaminants, which can affect performance and air quality. A regular aircon chemical wash can be the ultimate maintenance solution for keeping your aircon efficient and long-lasting. Let’s explore the specific benefits of scheduling regular chemical washes for your aircon, particularly for tropical climates.

1. Enhances Cooling Efficiency

One of the most significant benefits of a chemical wash is improved cooling efficiency. When your aircon’s internal components, such as the evaporator coils and filters, become clogged with dust and grime, the unit has to work harder to maintain the desired temperature. These components are cleaned thoroughly during a chemical wash, removing blockages and restoring airflow. This deep cleaning process improves the cooling power of your aircon, allowing it to cool rooms more effectively even in the tropical heat.

2. Improves Air Quality

Aircon units are more susceptible to mold and bacteria growth in humid environments due to the moisture that accumulates within the system. Over time, these pollutants can become airborne, posing health risks to you and your family, particularly those with asthma or allergies. A chemical wash removes these harmful contaminants from your aircon’s internal components, resulting in cleaner, healthier air. This is especially important in the tropics, where high humidity can accelerate the growth of mold, mildew, and bacteria within aircon units.

3. Reduces Energy Consumption

An aircon clogged with dirt and mold has to use more energy to achieve the desired cooling levels. With a chemical wash, all grime and debris are removed, which helps the aircon run smoothly without unnecessary strain. The increased efficiency reduces the unit’s energy consumption, lowering electricity bills. This is a significant advantage in the tropics, where air conditioning is used extensively, and electricity bills can skyrocket. Regular chemical cleaning ensures that your aircon remains energy-efficient, which benefits your wallet and the environment.

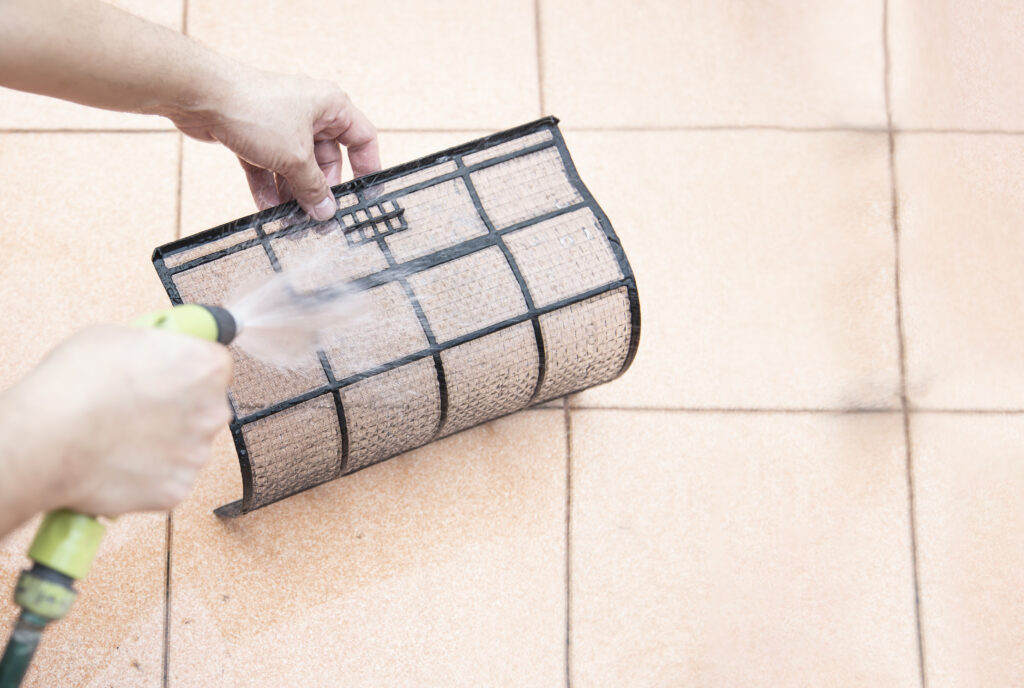
aircon technician cleaning out aircon filters
Aircondition service cleaning

4. Prevents Costly Repairs and Extends Lifespan

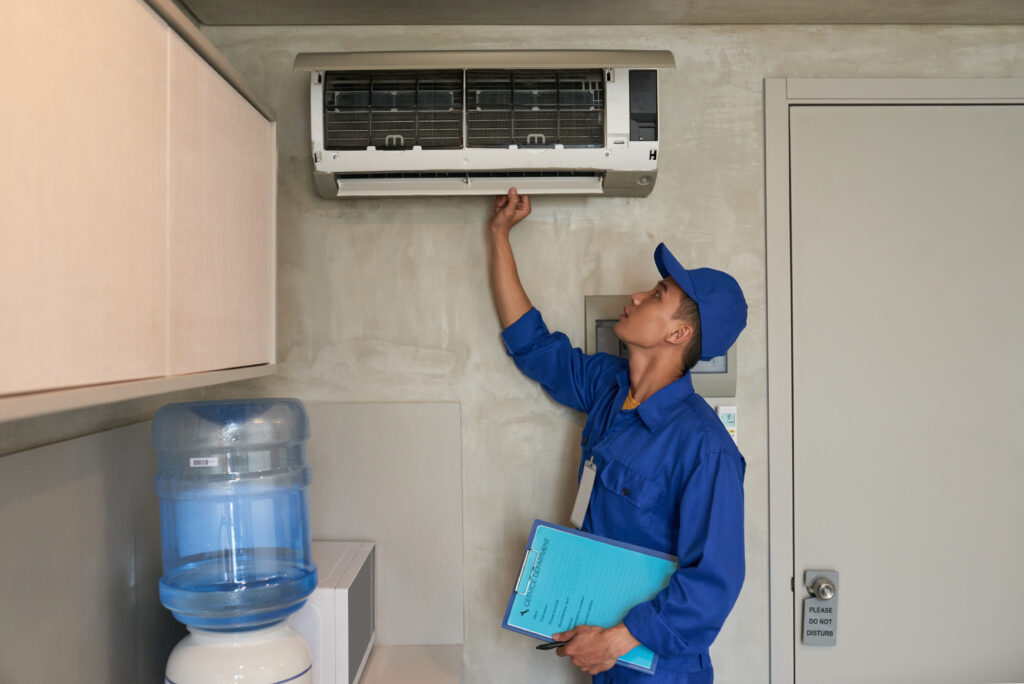
Routine maintenance, such as chemical washing, can help detect potential problems early, reducing the risk of major breakdowns. A chemical wash can prevent costly repairs down the road by cleaning components thoroughly and ensuring they are in top shape. An aircon that undergoes regular chemical maintenance generally has a longer lifespan than one that needs adequate care. Given our tropical climate, which puts additional strain on aircon systems, regular chemical washes can be a wise investment in the longevity of your unit.

5. Removes Unpleasant Odors

A buildup of mold, mildew, or stagnant water within your aircon can result in unpleasant odors. Since these contaminants thrive in humid conditions, this issue is prevalent in tropical areas. A chemical wash tackles these problems by thoroughly cleaning the aircon’s internal parts, leaving your unit smelling fresh and odor-free. This can enhance your comfort at home, as you won’t have to deal with the stale or musty smells from an unmaintained aircon.

6. Ensures Optimal Humidity Control

Tropical regions are notorious for their high humidity, which makes indoor environments damp and uncomfortable. A properly maintained aircon with clean filters and evaporator coils, will regulate humidity levels more effectively. A chemical wash helps your air conditioner dehumidify your indoor space efficiently by removing built-up dirt. This adds to the comfort of your home and protects your furniture and fixtures from moisture-related damage, which is common in humid climates.

7. Enhances Environmental Friendliness

Reducing energy consumption isn’t just beneficial for your bills — it’s also good for the environment. Regular chemical washes help maintain your aircon’s efficiency, requiring less power to operate. In a tropical climate where aircon units may be running for long hours daily, reducing energy use can significantly lower your carbon footprint. By scheduling chemical washes and reducing the energy your aircon consumes, you contribute to a more sustainable future.

8. Reduces Allergens and Dust Mites

For people with allergies, regular aircon chemical washing can be especially beneficial. Dust mites and allergens thrive in warm, humid environments, and an unclean aircon can spread these allergens throughout your home. A chemical wash removes these irritants from your aircon unit, resulting in cleaner air and fewer allergy triggers in your living space. This is especially important for homes with children, elderly residents, or individuals with respiratory issues.

9. Ensures Better Sleep Quality

A clean and efficient air conditioner can significantly affect your sleep quality. High temperatures and humidity can make sleeping uncomfortable in tropical areas, leading to restless nights. A well-maintained aircon can cool the room more effectively, creating a comfortable sleep environment. The improved air quality and reduced allergens mean you can breathe easier while sleeping, reducing the chances of interrupted sleep due to sneezing, coughing, or congestion.

Final Thoughts

Regular aircon chemical washes are essential for homeowners in tropical climates to maintain a comfortable, healthy, and energy-efficient living space. This type of deep cleaning helps keep your aircon in top shape, ensuring it cools effectively, saves energy, and provides high-quality air. While it may seem like an additional expense, the long-term benefits — including lower energy bills, fewer repairs, and extended lifespan of your unit—make it a wise investment.

To get the most out of your aircon system, consider scheduling a chemical wash every six months or according to your usage and the recommendations of your aircon servicing provider. This routine maintenance will help you avoid common issues and maintain a comfortable, clean home environment, even in the humid heat of the tropics.

Quick Tips to Make Your Kitchen Cabinets Look Brand New

image of kitchen cabinets

Kitchen cabinets are among the most used parts of a kitchen, which can cause them to show signs of wear and tear over time. Grease, grime, and general use can dull their appearance, leaving your kitchen tired. Refreshing your cabinets can make your entire kitchen feel new, without needing a complete renovation. Here are some practical, budget-friendly tips to bring your kitchen cabinets back to life.

Deep Clean to Remove Grease and Grime

Over time, cabinets accumulate grease and dirt, especially in high-use areas around the stove. Begin by thoroughly cleaning them to remove built-up residue.

SolutionMix warm water, dish soap, vinegar, or a mild degreaser. This combination effectively cuts through grease without damaging the surface.
MethodDampen a soft cloth or sponge with the solution and wipe down all surfaces. Avoid soaking the wood, especially on wooden cabinets, to prevent damage.

Polish or Refinish the Surface

Polishing can restore the original sheen and make cabinets look refreshed. If your cabinets are wood, a wood polish or conditioner will nourish the material, bringing out its natural color and texture.

Wood CabinetsTo condition and polish wood cabinets, use a wood polish or a homemade solution of olive oil and lemon juice.
Laminate or Painted CabinetsUse a non-abrasive cleaner to add shine. A gentle rub with a damp cloth can restore vibrancy without damaging the paint for painted cabinets.

Replace or Clean Cabinet Hardware

Old, tarnished, or dirty hardware can make cabinets appear older than they are. Replacing or cleaning the hardware can create a new, polished look.

CleaningSoak metal handles or knobs in warm soapy water and scrub with a soft brush.
ReplacementConsider replacing knobs and handles with modern hardware for an updated look. Try to choose hardware that complements your kitchen style—sleek handles for contemporary kitchens, or rustic knobs for a farmhouse feel.
image of a white kitchen

Touch-Up Paint or Apply a Fresh Coat

If your cabinets are painted, consider touching up areas where the paint has chipped or faded. A fresh coat of paint can also completely transform the look of your cabinets and give your kitchen a fresh start.

Matching PaintIf you’re touching up, try to match the existing color as closely as possible.
RepaintingFor a complete makeover, sanding down cabinets before applying a fresh coat of paint will ensure even coverage. Use primer and finish with a durable paint that can withstand the demands of a kitchen environment.

Popular colors like white, navy, or dark green can modernize cabinets and align with current kitchen trends.

Add Peel-and-Stick Vinyl for a Quick Update

Peel-and-stick vinyl is an affordable and easy-to-use material for adding character to your cabinets. Available in various colors, textures, and patterns, vinyl can simulate wood grain, stone, or even metallic finishes.

How to ApplyClean the cabinet surface thoroughly, measure carefully, and apply the vinyl by smoothing it out to avoid air bubbles.
Removable OptionVinyl is also removable, making it ideal for renters or those who like to change their decor frequently.

Fun Fact: Vinyl is trendy for those who want a temporary change without a significant commitment or cost.

Add Molding or Trim for a Custom Look

Adding molding or trim can create a custom look, giving basic cabinets a higher-end appearance.

Crown MoldingInstall crown molding along the top of your cabinets to add height and sophistication.
Beadboard or PanelingAttach beadboard or raised panels to cabinet doors for a farmhouse or shaker-style effect.

Fun Fact: Adding molding is more labor-intensive but can dramatically enhance your cabinets and make them look custom-made.

kitchen with glass panels

Use Glass Panels or Open Shelving

If you want a more open look, consider removing the cabinet doors altogether or replacing solid doors with glass panels.

Glass PanelsInstalling glass panels on select cabinet doors opens the space and showcases beautiful dishware or decor.
Open ShelvingRemoving doors for open shelving creates a contemporary look and provides easy access to everyday items.

Install Cabinet Lighting

Adding lighting inside or under cabinets can create a warm ambiance and highlight the beauty of your cabinets.

Under-Cabinet LightingLED strips or puck lights can be installed under cabinets to illuminate the countertop and create a cozy atmosphere.
Interior LightingFor glass cabinets, adding interior lighting highlights the contents and gives the kitchen a luxurious feel.

Lighting doesn’t just serve a practical purpose but also enhances the aesthetics of your kitchen.

Organize and Declutter Cabinet Interiors

While focusing on the exterior is essential, don’t neglect the insides of your cabinets. Organized cabinets are easier to use and add to the overall functionality of your kitchen.

DeclutterRemove items you no longer use and organize the remaining contents.
Add Shelf LinersLiners protect shelves from scratches and spills while making cleaning easier.
Use OrganizersDrawer dividers, lazy Susans, and baskets can keep items in order and maximize space.

An organized interior makes a big difference in maintaining the cabinet’s overall appearance.

Apply a Sealant for Lasting Protection

Once you’ve cleaned, polished, or painted your cabinets, applying a sealant can protect them from future wear and tear.

Wood CabinetsUse a wood sealant to prevent moisture damage.
Painted CabinetsA clear, non-yellowing topcoat or sealer over paint will increase durability.

Adding a sealant ensures your efforts are preserved, keeping your cabinets looking newer for longer.

Final Thoughts

Revamping your kitchen cabinets doesn’t have to be costly or time-consuming. By incorporating these tips, you can maintain a fresh, polished look for your cabinets and, in turn, your kitchen as a whole. Small changes can make a substantial difference, whether it’s adding new hardware, a coat of paint, or subtle lighting. A consistent cleaning and maintenance routine will go a long way in keeping your kitchen looking pristine. If you’re short on time, consider enlisting a part-time cleaner to help keep your cabinets looking their best.

Is It Important Or Economical To Have An Aircon In The Living Room?

woman adjusting the temperature of an aircon in living room

Living in Singapore or any other tropical region means hot and humid weather year-round, with little seasonal relief from the sweltering heat. As a result, many homeowners like you may wonder if installing an aircon unit in the living room makes economic and practical sense. The benefits of having an aircon in the living room extend beyond comfort to energy efficiency, property value, and health considerations. This article delves into the key factors to help you decide whether an aircon is essential for your living space.

Enhanced Comfort in Shared Spaces

The living room is often the heart of the home, where family members gather to relax, watch TV, entertain guests, or spend quality time together. This shared space’s comfortable and cool environment can significantly enhance the overall living experience.

In tropical regions like Singapore, temperatures frequently rise above 30°C, and the accompanying humidity can make it feel even hotter. Installing an aircon in the living room helps maintain a consistent temperature, allowing family members to enjoy the space without feeling drained or uncomfortable from the heat. Plus, the living room becomes the focal point during gatherings or events, making it essential to keep it well-cooled and comfortable.

Improved Air Quality and Health Benefits

A sound aircon system does more than cool the air; it also filters and circulates it, removing airborne allergens, dust, and pollutants that can affect health. For homes in tropical climates, where humidity levels are high, aircon reduce indoor moisture, which can prevent mold growth — a common issue in warm, damp environments. Mold can aggravate respiratory conditions such as asthma or allergies, making an aircon particularly beneficial for those with sensitivities.

The air filter in an aircon captures contaminants and allergens, providing cleaner indoor air. This feature is essential for people in tropical regions, as open windows — which would naturally ventilate the space — often let in pollen and pollution. By keeping windows closed and relying on an aircon for fresh air circulation, you can create a healthier indoor environment.

aircon running 24hrs a day

Economic Considerations and Energy Efficiency

Initial Investment and Installation Costs

While the initial cost of installing an aircon in the living room can be high, it is essential to consider the long-term benefits. Modern aircon units with energy-saving features like inverter technology provide cost-effective cooling that reduces overall energy consumption. Additionally, aircon units with a high Energy Efficiency Ratio (EER) or Seasonal Energy Efficiency Ratio (SEER) are optimized for low power usage, making them more economical in the long run.

Energy Consumption and Cost Savings

The cost of aircon running is a common concern, but new technologies have made aircons more energy-efficient. Inverter aircon units, for example, can adjust the compressor speed based on the room’s cooling needs, rather than operating at total capacity constantly. This approach conserves energy, reduces wear on the system, and saves money on electricity bills over time.

To make your living room aircon even more cost-effective, consider pairing it with ceiling fans or optimizing insulation in the room. Ceiling fans circulate the cool air produced by the aircon, allowing you to set the temperature slightly higher without sacrificing comfort. Proper insulation also prevents cool air from escaping, reducing the aircon’s workload and thus lowering electricity costs.

Increased Property Value

For homeowners considering long-term benefits, installing an aircon in the living room can add value to the property. Prospective buyers in tropical climates often prioritize aircon spaces as a standard feature, especially in areas like the living room, where people spend most of their time. A well-maintained aircon system enhances the appeal of your home, potentially increasing its resale value. For rental properties, an aircon in the living room can be a significant draw for tenants, allowing landlords to set higher rental rates.

Practical Alternatives for Optimal Cooling

If you’re still undecided about a complete aircon installation, consider some alternatives that help improve comfort while managing energy costs:

Portable airconsThese units can be an excellent choice for those on a budget. They are easy to move and do not require professional installation, making them a cost-effective solution for temporary cooling.
Ceiling and Tower FansFor smaller spaces, ceiling fans or tower fans can improve air circulation, providing a cooling effect without the energy consumption of an aircon.
Smart ThermostatsConsider a smart thermostat if you already have an aircon. These devices allow you to set cooling schedules and monitor your energy usage, helping to maximize efficiency without running the aircon constantly.
woman carrying dirty aircon filters
Woman holding very dirty air conditioner filters

Maintenance and Upkeep

Investing in an aircon also means accounting for regular maintenance to ensure optimal performance and energy efficiency. Scheduling professional servicing, such as chemical washes and filter cleaning, can prolong the lifespan of your unit. Clean air filters improve airflow, allowing the aircon to work efficiently without consuming extra energy. Regular maintenance also prevents issues that could lead to costly repairs.

Environmental Considerations

Beyond personal comfort, using aircon thoughtfully is essential for environmental reasons. High energy consumption contributes to carbon emissions and overall environmental impact. Using energy-efficient aircons and setting them at reasonable temperatures allows you to enjoy a comfortable living space while minimizing your carbon footprint. Some eco-friendly aircon models now use refrigerants with lower Global Warming Potential (GWP), further reducing environmental impact.

Final Thoughts

In conclusion, having an aircon in the living room can be an intelligent investment in hot climates like Singapore. The comfort it provides, with health benefits and potential savings from energy-efficient models, makes it a worthwhile addition to any home. However, to maximize these benefits, choose an aircon unit with high energy efficiency and maintain it regularly. Combining your aircon use with ceiling fans, smart thermostats, and proper insulation can enhance efficiency and keep your living room comfortable without breaking the bank.

For those prioritizing eco-friendliness, look for energy-saving models and adopt mindful usage habits. While an airconMaximize comfort and energy savings with a living room aircon. Learn if it’s a smart choice for tropical climates like Singapore. Find out more here! may represent an initial cost, the long-term savings, improved comfort, and added property value make it a valuable asset for homes in the tropics.