How to Clean and Disinfect Electronics Safely

touching a screen

Electronics have become indispensable in our daily lives, but they’re also some of the most frequently touched items, making them hotspots for germs and bacteria. Whether it’s your smartphone, laptop, or remote control, keeping these devices clean and disinfected is essential for your health and to ensure their longevity. However, cleaning electronics requires special care to avoid damaging sensitive components. Here’s a comprehensive guide on how to clean and disinfect your electronics safely.

Why Cleaning and Disinfecting Electronics Is Important

Electronics accumulate dust, fingerprints, and oils over time. They can also harbor harmful bacteria and viruses, especially in shared spaces or during flu season. Regular cleaning not only promotes hygiene but also ensures optimal device performance.

using a microfiber cloth to wipe a laptop screen

Essential Tools and Materials

Before starting, gather the following tools and materials:

  • Microfiber Cloths: Soft and lint-free, perfect for delicate surfaces.
  • Isopropyl Alcohol (70%): A safe disinfectant that evaporates quickly.
  • Distilled Water: Prevents mineral deposits on screens and surfaces.
  • Cotton Swabs: Useful for hard-to-reach areas.
  • Compressed Air Can: Removes dust from tight spaces.
  • Cleaning Wipes: Ensure they are electronics-safe and alcohol-based.
  • Small Brush: A soft-bristled brush can clean between keys and crevices.

Step-by-Step Guide to Clean and Disinfect Electronics

1. Power Down and Unplug

Always turn off and unplug your device before cleaning. This reduces the risk of electrical shock and prevents damage to the internal components.

2. Dust Removal

  • Use a soft microfiber cloth or a small brush to remove loose dust and debris from the surface.
  • For keyboards, ports, and other crevices, use a can of compressed air to blow away dust particles. Hold the can upright and use short bursts to avoid condensation.

3. Screen Cleaning

  • Create a 1:1 solution of isopropyl alcohol and distilled water.
  • Lightly dampen a microfiber cloth with the solution—never spray directly onto the screen.
  • Wipe the screen gently in a circular motion to remove fingerprints, smudges, and grime.
  • For touchscreens, use electronics-safe cleaning wipes if you prefer a ready-made option.

4. Disinfecting Keyboards and Remote Controls

  • Dip a cotton swab in isopropyl alcohol and run it between the keys or buttons to disinfect hard-to-reach areas.
  • Wipe down the surface with a slightly damp microfiber cloth.
  • Let the device air dry completely before plugging it back in or turning it on.

5. Cleaning Smartphone and Tablet Cases

  • Remove the case and clean it separately.
  • Wash with warm, soapy water for silicone and plastic cases, then disinfect with isopropyl alcohol.
  • For leather cases, use a leather-safe cleaner followed by a disinfectant.

6. Headphones and Earbuds

  • Gently clean the ear tips and outer casing with a damp microfiber cloth.
  • Use a dry cotton swab to remove wax or debris from small openings like the mesh or charging port.
  • Wipe down the cords and connectors with isopropyl alcohol.

7. Ventilation Areas

  • Use compressed air to clean vents on laptops, desktops, and gaming consoles. This prevents overheating and ensures efficient airflow.
  • Avoid using liquids near vents to prevent moisture from seeping into internal components.
woman using a laptop

Do’s and Don’ts for Cleaning Electronics

Do’s:

  • Use only recommended cleaning solutions like isopropyl alcohol or distilled water.
  • Ensure cloths and swabs are only slightly damp, not soaking wet.
  • Allow devices to air dry thoroughly before turning them back on.

Don’ts:

  • Never use harsh chemicals like ammonia or bleach on electronics.
  • Avoid spraying liquids directly onto devices.
  • Don’t use abrasive materials like paper towels that can scratch screens.

How Often Should You Clean Electronics?

The frequency depends on the device and its usage:

  • Smartphones: Daily cleaning is recommended, as they are frequently touched.
  • Keyboards and Mice: Clean weekly or more often if shared.
  • Remote Controls: Disinfect every few days, especially in households with children or during flu season.
  • Laptops and Monitors: Wipe down every one to two weeks.

Final Thoughts

When push comes to shove, it’s better to opt for professional cleaning for heavily soiled devices or those with internal dust buildup. This is especially true for desktops, gaming consoles, or laptops with cooling systems.

Cleaning and disinfecting your electronics extends their lifespan and promotes a healthier living and working environment. You can enjoy streak-free screens, responsive keyboards, and germ-free devices with proper techniques and regular maintenance.

How to Clean Windows Without Leaving Streaks

window cleaners

Cleaning windows can be challenging, especially if striving for a streak-free shine. Streaky windows not only detract from the beauty of your home but also obscure your view. You can achieve sparkling, streak-free windows effortlessly with the proper techniques, tools, and cleaning solutions. Here’s a comprehensive guide to cleaning your windows without leaving those pesky streaks behind.

Why Do Windows Get Streaky?

Before diving into cleaning techniques, it’s essential to understand why windows often end up streaky after cleaning:

  1. Dirty Cleaning Tools: Using unwashed or overly wet cloths and squeegees can leave residue on the glass.
  2. Improper Cleaning Solutions: Low-quality or incorrect cleaning solutions may leave a film on the surface.
  3. Poor Timing: Cleaning windows under direct sunlight causes the cleaning solution to dry too quickly, leaving streaks.
  4. Using Hard Water: Hard water contains minerals that can dry into streaks if not wiped properly.

Addressing these factors can significantly reduce streaks and achieve clear, polished windows.

Essential Tools for Streak-Free Windows

  1. Microfiber Cloths: Microfiber cloths are highly absorbent and lint-free, perfect for wiping windows without residue.
  2. Squeegees: A high-quality squeegee with a rubber blade ensures an even finish by removing excess cleaning solution in a single swipe.
  3. Cleaning Solution: Opt for a mix of water, vinegar, and a drop of dish soap for an effective and eco-friendly cleaning solution. Commercial streak-free glass cleaners also work well.
  4. Bucket or Spray Bottle: A bucket allows for easy dipping, while a spray bottle ensures even application of the cleaning solution.
  5. Old Towels or Newspapers: Towels can catch drips and clean the surrounding area, while newspapers are an old-school trick for achieving a streak-free finish.
window cleaners

Step-by-Step Guide to Cleaning Windows Without Streaks

1. Prepare Your Windows

Before starting, remove any dust, dirt, or cobwebs from the window frame and glass using a dry cloth or duster. This prevents dirt from turning into muddy streaks when water is applied.

2. Create an Effective Cleaning Solution

Mix the following in a spray bottle:

  • 1 cup of water
  • 1 cup of white vinegar
  • One drop of dishwashing liquid

Shake the solution gently to combine. Vinegar effectively cuts through grease and grime, while dish soap helps lift stubborn dirt.

3. Work on a Cool Day

Avoid cleaning windows when they’re exposed to direct sunlight. The heat causes cleaning solutions to evaporate too quickly, leading to streaks. Early morning or late afternoon is ideal.

4. Spray and Clean

Spray the cleaning solution generously onto the window glass. Use a microfiber cloth or sponge to scrub away dirt and grime gently. Work from the top to the bottom in straight strokes.

5. Use a Squeegee for a Streak-Free Finish

Immediately after cleaning, use a squeegee to remove the solution. Start from the top of the window and pull the squeegee down in straight, overlapping strokes. Wipe the squeegee blade with a dry cloth after each pass to prevent streaks.

6. Wipe the Edges

Use a dry microfiber cloth or newspaper to wipe any remaining moisture along the edges of the glass.

7. Check for Streaks

Inspect the glass from different angles. If streaks are visible, repeat the process with a clean microfiber cloth and minimal cleaning solution.

How to Clean Specific Types of Windows

1. Double-Hung Windows

For windows that slide, tilt them inward to clean the interior and exterior quickly. Follow the same cleaning steps for each side.

2. Skylights

Use a long-handled squeegee for hard-to-reach skylights. Be cautious with cleaning solutions, as they may drip.

3. Tinted Windows

Avoid ammonia-based cleaners for tinted windows, as they can damage the tint. Use a mild vinegar solution instead.

Final Thoughts

For high-rise or difficult-to-reach windows, consider hiring professional cleaning services. They have the right equipment and expertise to clean windows safely and effectively.

Achieving spotless, streak-free windows is more manageable than it may seem. With the right tools, techniques, and patience, you can enjoy crystal-clear windows that enhance the appearance of your home.

Top 5 Cleaning Tasks to Outsource to a Part-Time Maid

Indian helper cleaning utensils

Keeping your home clean and organized is essential for a comfortable and stress-free living environment. However, with the demands of work and family life, finding time for thorough cleaning can be challenging. Hiring a part-time maid is a cost-effective and efficient solution to ensure your home remains spotless without compromising your busy schedule.
Here are the top five cleaning tasks you can confidently outsource to a part-time maid to maintain a pristine home environment.

1. Deep Cleaning the Kitchen

The kitchen is the heart of the home but also one of the most challenging areas to clean. A part-time maid can tackle this task with precision and expertise, ensuring your kitchen is hygienic and free from grease and grime.

Key Tasks:

  • Cleaning Appliances: Scrubbing the oven, microwave, and refrigerator to remove built-up grease and food residue.
  • Wiping Cabinets and Countertops: Removing stains, grease, and dust to keep surfaces spotless.
  • Degreasing Backsplashes and Walls: Ensuring no sticky residues remain on tiled surfaces.
  • Sanitizing Sinks and Faucets: Remove limescale and ensure your germ-free sink area.

Why Outsource This?

Deep cleaning a kitchen requires time, effort, and specialized cleaning products. A professional can efficiently handle these tasks, leaving your kitchen sparkling clean and ready for meal preparation.

2. Bathroom Sanitization

Bathrooms are another high-maintenance area in any home. They are prone to mold, mildew, and soap scum, which can accumulate quickly. A part-time maid can ensure your bathrooms are thoroughly sanitized and fresh.

Key Tasks:

  • Scrubbing tiles and grout: Remove dirt and mold from bathroom tiles and grout lines.
  • Cleaning Toilets and Sinks: Sanitizing and deodorizing these frequently used areas.
  • Polishing Mirrors and Glass: Ensuring streak-free, shiny surfaces.
  • Clearing Drains: Preventing clogs and ensuring smooth water flow.

Why Outsource This?

Bathroom cleaning is labor-intensive and often involves dealing with harsh chemicals. A trained cleaner has the expertise and tools to handle these tasks safely and effectively.

3. Dusting and Vacuuming

Dust accumulates quickly in Singapore’s humid climate, especially if windows are frequently left open. Dusting and vacuuming are essential tasks to keep your home allergen-free and tidy.

Key Tasks:

  • Dusting Furniture and Surfaces: Removing dust from shelves, tables, and décor.
  • Vacuuming Carpets and Rugs: Eliminating dirt, pet hair, and allergens trapped in fibers.
  • Cleaning Ceiling Fans and Light Fixtures: Reaching those often-overlooked areas.
  • Wiping Down Window Sills and Blinds: Ensuring these surfaces are free of dust and grime.

Why Outsource This?

Professional cleaners can efficiently tackle hard-to-reach areas and use specialized equipment for a more thorough clean, saving you time and effort.

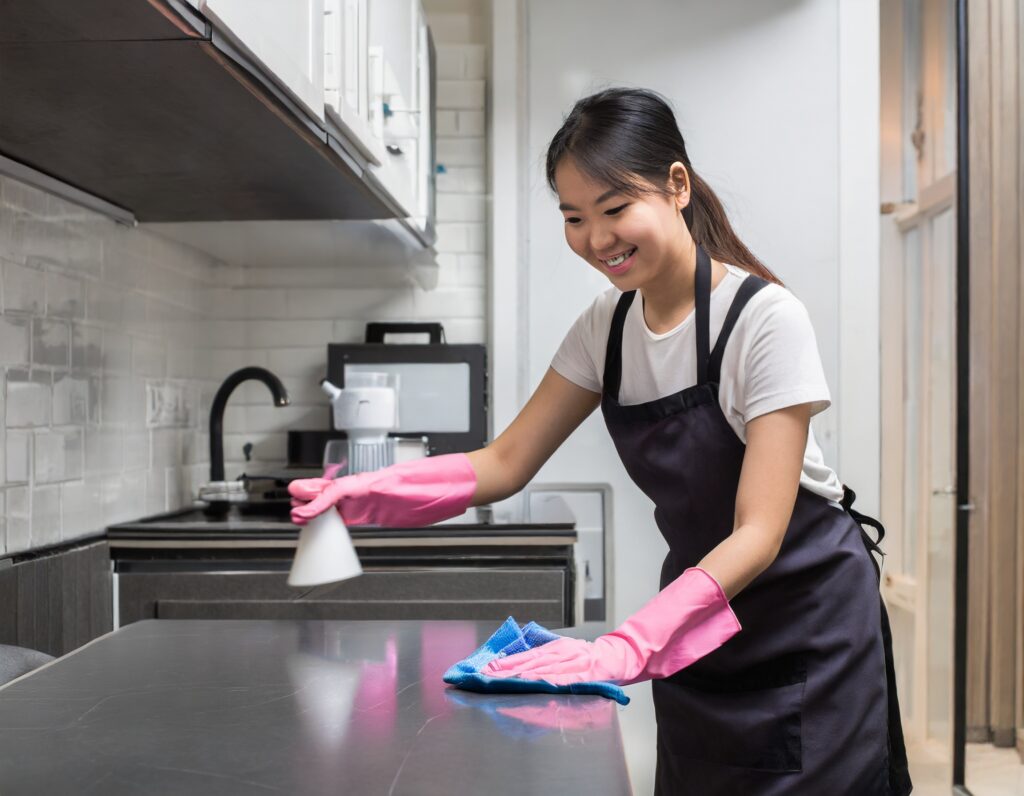
Pretty young girl hardworking as a professional cleaner

4. Laundry and Ironing

Managing laundry is a never-ending chore, especially for larger households. A part-time maid can help you stay on top of this task, ensuring clean and wrinkle-free clothes.

Key Tasks:

  • Washing and Drying Clothes: Using your home appliances to handle laundry efficiently.
  • Folding and Ironing: Deliver neatly folded or ironed clothes ready to wear.
  • Changing Bed Linens: Keeping your sleeping environment fresh and inviting.

Why Outsource This?

Outsourcing laundry and ironing frees up your time for more important activities while ensuring your clothes are handled carefully.

5. Post-renovation or Seasonal Cleaning

Post-renovation cleaning or preparing your home for the festive season requires more effort than regular cleaning. A part-time maid can manage these tasks, ensuring your home is spotless.

Key Tasks:

  • Removing Dust and Debris: Cleaning construction dust after renovations.
  • Polishing Floors: Restoring shine to hardwood or tiled flooring.
  • Washing Windows: Ensuring streak-free glass for a clear view.
  • Organizing Spaces: Helping you declutter and arrange items efficiently.

Why Outsource This?

These tasks often require specialized tools and techniques, making relying on a professional cleaner to achieve the best results easier.

Final Thoughts

Outsourcing cleaning tasks to a part-time maid is a practical solution for busy individuals or families in Singapore. You can enjoy a clean and organized home without stress by delegating labor-intensive tasks like kitchen cleaning, bathroom sanitization, dusting, laundry, and post-renovation tidying. Remember, investing in professional help saves time and ensures your living space is maintained to the highest standards.

How to Maintain a Clean Home Between Part-Time Maid Visits

image of a cleaner holding a spray bottle

Hiring a part-time maid in Singapore is convenient for keeping your home clean and organized. However, it’s essential to maintain the cleanliness of your space between visits to avoid unnecessary mess or stress. With simple strategies and daily habits, you can ensure your home stays spotless until your maid returns.

Declutter Daily

Clutter can quickly make a clean home feel messy. Spend 10–15 minutes daily tidying up high-traffic areas like the living room, kitchen, and entryway. This small effort helps reduce the workload for your part-time maid and keeps your home looking neat.

Tips for Daily Decluttering:

Use storage baskets for toys, remotes, or miscellaneous items.
Encourage family members to return items to their proper place after use.
Sort mail and discard junk immediately to prevent paper pile-ups.

Establish a Cleaning Routine

Divide household chores into manageable daily tasks to avoid overwhelming yourself. By spreading functions throughout the week, you can keep your home in good condition without devoting hours to cleaning.

Sample Weekly Schedule:

MondayDust surfaces and electronics.
TuesdaySweep and mop the kitchen.
WednesdayWipe down mirrors and glass surfaces.
ThursdayClean bathroom sinks and countertops.
FridayVacuum rugs and carpets.
image of the inside of a kitchen

Focus on High-Traffic Areas

Certain areas of your home, like the kitchen and bathroom, accumulate dirt faster than others. Pay special attention to these spaces to maintain a hygienic environment between cleaning sessions.

Kitchen Maintenance:

Wash dishes immediately or load them into the dishwasher.
Wipe down counters and stovetops after cooking.
Empty the trash regularly to avoid odors.

Bathroom Maintenance:

Use a squeegee to wipe down shower walls and doors after each use.
Clean the sink daily to prevent soap scum buildup.
Replace towels frequently to maintain freshness.

Invest in Smart Cleaning Tools

Having the right tools on hand makes daily cleaning easier and more efficient. Lightweight, easy-to-use equipment encourages quick touch-ups and helps maintain cleanliness.

Recommended Tools:

Microfiber cloths For dusting and wiping surfaces.
Cordless vacuum cleaners For spot-cleaning floors and carpets.
Disinfecting wipes For quick cleanups of spills or stains.
Mops with reusable pads For regular floor maintenance.

Set Rules for your Household

A clean home requires teamwork, especially in households with multiple members. Establish simple rules to keep everyone accountable for maintaining cleanliness.

Examples of House Rules:

No shoes inside the house to reduce dirt on floors.
Always make the bed after waking up.
Clear and wipe the dining table after meals.
Take out the trash when the bin is full.

Address Spills and Messes Immediately

Don’t let spills and stains linger—they’re easier to clean when addressed immediately. Whether it’s a coffee spill on the countertop or crumbs on the floor, cleaning up promptly prevents stains from setting and reduces the time spent on deep cleaning later.

Quick Cleaning Essentials:

Baking soda for stain removal.
All-purpose cleaner for kitchen and bathroom surfaces.
A handheld vacuum for quick crumb cleanups.
image of wall organizers

Minimize Clutter in Shared Spaces

Clutter in communal areas can disrupt the flow of your home and make it harder to keep clean. Regularly declutter shared spaces like the living room, dining area, and entryway.

Decluttering Hacks:

Use stylish baskets to store remote controls, books, or blankets.
Install hooks or a wall organizer near the entryway for keys and bags.
Store seasonal items in labeled boxes to keep them out of sight.

Freshen the Air

A clean home should also smell fresh. Enhance the ambiance by keeping your living spaces well-ventilated and adding pleasant scents.

Tips to Freshen Your Home:

Open windows daily to let in fresh air.
Use essential oil diffusers or scented candles for a calming atmosphere.
Place bowls of baking soda in problem areas to absorb odors.

Prepare for Your Maid’s Next Visit

Preparing your home before your maid’s visit will ensure they can focus on deeper cleaning tasks, maximizing the value of their service.

Preparation Checklist:

Clear surfaces of clutter so they can focus on cleaning.
Identify specific areas that need attention, like a dusty ceiling fan or a stained carpet.
Restock cleaning supplies, such as detergents and sponges, if needed.

Reward Yourself for Staying Consistent

Maintaining a clean home can feel like a chore, but celebrating your progress motivates you. Whether treating yourself to a coffee or enjoying a relaxing evening in your tidy home, small rewards can reinforce good habits.

Final Thoughts

Keeping your home clean between part-time maid visits doesn’t have to be overwhelming. You can maintain a welcoming environment without hassle with consistent effort, the right tools, and teamwork. Not only does this create a more pleasant living space, but it also allows your maid to focus on more intensive cleaning tasks during their visits. By following these tips, you’ll enjoy a consistently clean and comfortable home that you’ll love returning to daily.

7 Aircon Myths Debunked: What You Need to Know

Aircons are a staple in many households, especially in Singapore’s hot and humid climate. Despite their importance, many myths surrounding aircon usage and maintenance persist. These misconceptions can lead to improper use, higher energy bills, or even damage to your unit. Let’s set the record straight by debunking seven common aircon myths.

Myth 1: Setting the Temperature Lower Cools the Room Faster

One of the most prevalent myths is that setting your aircon to the lowest temperature cools the room faster. While it might feel intuitive, this differs from how aircon works.

Fact: Aircons cool at a consistent rate regardless of the temperature setting. Lowering the temperature drastically will not speed up the cooling process but will keep the compressor running longer, leading to higher energy consumption. Instead, set your aircon to a comfortable temperature, typically around 24–26°C, for optimal cooling and efficiency.

Myth 2: You Don’t Need to Service Your Aircon Regularly

Some people believe aircon maintenance is only necessary when problems arise. This approach, however, can lead to costly repairs in the long run.

Fact: Regular servicing is essential for maintaining your aircon’s efficiency and longevity. Dirty filters and coils force the unit to work harder, consuming more energy and reducing cooling performance. Schedule professional servicing every three to six months to keep your unit in shape.

Portrait Of Smiling Young Woman Holding Remote Controller Of Air Conditioner At Home

Myth 3: Leaving the Aircon on All Day Saves Energy

Leaving the aircon running continuously is more efficient than turning it on and off as needed.

Fact: Leaving your aircon on all day wastes energy and increases your electricity bill. It’s better to use a programmable timer to regulate cooling based on your schedule. For example, set the aircon to turn on 30 minutes before you arrive home instead of running it all day.

Myth 4: Aircon Use is Unhealthy

Some claim aircon causes illnesses like colds or respiratory problems, mainly when used for extended periods.

Fact: Properly maintained aircons improve indoor air quality by filtering dust, allergens, and pollutants. Issues arise when filters are not cleaned regularly, allowing contaminants to circulate. Ensure your aircon is serviced and the filters are cleaned or replaced to maintain a healthy indoor environment.

Myth 5: Bigger Aircons Are Always Better

It’s common to assume that a larger aircon unit will provide faster and more effective cooling.

Fact: The size of your aircon should match the size of the room. An oversized unit will cool the room too quickly, causing it to cycle on and off frequently, which wastes energy and leads to uneven cooling. Conversely, an undersized unit will need help to cool the space efficiently. Consult a professional to determine the right aircon size for your room.

Myth 6: Aircons Can Only Cool, Not Dehumidify

Many believe aircons are solely for cooling and do not affect humidity.

Fact: Aircons are designed to dehumidify as they cool. By removing excess moisture from the air, aircons create a more comfortable indoor environment, especially in humid climates like Singapore. Consider using the aircon with a dehumidifier for maximum comfort in rooms with persistent humidity issues.

image of living room with ceiling fan

Myth 7: Ceiling Fans and Aircons Shouldn’t Be Used Together

It’s often assumed that using a ceiling fan and aircon simultaneously is redundant or counterproductive.

Fact: Ceiling fans complement aircons by circulating cool air more effectively. This allows you to set your aircon at a slightly higher temperature while still feeling comfortable, which reduces energy consumption. Using both together can enhance cooling efficiency and lower your electricity bills.

Tips for Optimizing Aircon Use

To ensure your aircon works efficiently and effectively, keep these tips in mind:

Regular MaintenanceSchedule routine servicing to clean filters, check refrigerant levels, and inspect the system for potential issues.
Optimal Temperature SettingsKeep your aircon set between 24–26°C for comfort and energy savings.
Seal the RoomClose doors and windows to prevent cool air from escaping and warm air from entering.
Use Energy-Saving FeaturesTake advantage of your aircon unit’s timers, sleep mode, or eco settings.
Upgrade If NecessaryIf your aircon is outdated, consider investing in a modern, energy-efficient model with inverter technology.

Final Thoughts

Understanding the facts behind these common aircon myths can help you use your unit more effectively, save on energy costs, and prolong its lifespan. Small changes can significantly affect performance and efficiency.

If you’re looking for professional aircon servicing in Singapore, consult reliable providers who can ensure your unit runs smoothly and keeps your home comfortable year-round. Don’t let myths hold you back — confidently enjoy cool, energy-efficient comfort!

Is It Safe to Eat Expired Food? A Guide to Knowing When It’s Okay

Eating expired food is a common dilemma many face. With expiry dates printed on every product, throwing away perfectly edible food can sometimes feel wasteful. But when is it safe to consume food past its expiration date? In this guide, we’ll explore the types of expired food that might still be safe, how to determine their safety, and when it’s best to toss them out.

Understanding Expiry Dates

Before diving into specific foods, it’s important to understand what those expiry dates mean.

Use-By DateIndicates the last day a product is at its peak quality. For perishable items like dairy or fresh meat, avoiding consumption after this date is safer.
Best-Before DateSuggests when a product will maintain its best quality. Consuming items after this date is usually okay as long as they show no signs of spoilage.
Sell-By DateA retailer guideline, not a strict indication of food safety. Many products remain safe to eat for days or weeks past this date.

Foods That Are Safe After Their Expiry Date

Not all foods spoil immediately after their printed dates. Some can remain safe and delicious if stored properly.

image of stale bread

1. Bread

Bread is often safe to eat a few days past its best-before date, as long as there is no visible mold. Storing bread in the fridge can extend its shelf life by a few days. For even longer storage, freeze the bread and toast slices as needed.

2. Dry Foods (Cereal, Pasta, Rice)

Dry foods like cereals, pasta, and rice have a long shelf life and are typically safe months after their best-before date. Before consuming, check for signs of spoilage, like an off smell or visible pests.

3. Canned Goods

Canned goods are designed to last years if unopened and stored in a cool, dry place. The contents are likely safe as long as the can is not bulging, rusted, or dented. However, always smell and inspect the food before eating.

4. Hard Cheeses

Hard cheeses like Parmesan or cheddar can often be consumed even after some mold has developed. Cut off the moldy parts, ensuring a margin of about an inch, and the rest is safe to eat.

image of eggs

5. Eggs

Eggs remain fresh for weeks beyond expiration if kept in the refrigerator. A simple water test can determine freshness: place an egg in a water bowl. If it sinks, it’s good; if it floats, it’s time to throw it out.

Foods to Avoid After Expiry

Some foods are more prone to spoilage and can pose health risks if consumed past their expiration date.

1. Fresh Meat and Seafood

Raw meat and seafood are highly perishable and should only be consumed on their use-by dates. Spoiled meat can harbor dangerous bacteria like salmonella and E. coli, leading to foodborne illnesses.

2. Dairy Products

Milk, cream, and soft cheeses spoil quickly. While a sour smell or curdled texture is a clear indicator, some bacteria can develop before these signs appear. Always err on the side of caution with dairy.

3. Fresh Fruits and Vegetables

While many fruits and vegetables are fine with slight blemishes or spots, signs like sliminess, an unpleasant smell, or a completely mushy texture indicate spoilage.

How to Determine Food Safety

When in doubt, use your senses and judgment to determine whether food is safe. Here’s what to look for:

  1. Smell: If the food smells off, sour, or rancid, it’s likely unsafe to eat.
  2. Texture: Slimy, mushy, or sticky textures (when they shouldn’t be) are red flags.
  3. Color: Any significant discoloration, especially in meats and dairy, indicates spoilage.
  4. Taste: If the food tastes off, spit it out immediately.

Tips to Extend Food Shelf Life

Proper StorageKeep perishable items refrigerated or frozen. Use airtight containers for dry goods to prevent contamination and moisture exposure.
Check LabelsPay attention to storage instructions on packaging. Some foods may require refrigeration after opening.
Freeze When PossibleFreezing is an excellent way to preserve bread, meat, fruits, and some leftovers.
Practice FIFOFirst In, First Out. Use older items before newly purchased ones to reduce waste.

Final Thoughts

While it can be tempting to save money by consuming food past its expiry date, it’s crucial to prioritize safety. Understanding expiry labels and knowing which foods are safer to eat beyond their dates can help you reduce waste without compromising health. Always inspect your food, and when in doubt, throw it out — no savings are worth risking foodborne illnesses. You can also set up your own cleaning schedule to serve as a reminder on when you should check your food items.